This is part 2 of A Simple Guide to Photographing Big Mountains.
Part 1: A Simple Guide to Photographing Big Mountains
Part 2: The Right Light
Part 3: Composition Tips
Part 4: Star Images
Part 5: Adding People to the Scene
Light
The right light can make or break photographs. It is the most important element in photography, and mountain photography is no exception. Getting great light in the mountains can be tricky, but knowing how to plan and what to look for really helps to maximize your chances of walking away with a quality portfolio image.
When it comes to light, the first thing you should figure out is what the best type of light for your subject is, and when that light will be at its best. There are several answers to this question, depending on what you’re photographing. Some peaks receive sunrise light, others sunset. Some peaks don’t really catch great light in the morning or evening.
Finding out in which direction the sun rises or sets is easy with apps such as The Photographer’s Ephemeris. With the app you can pinpoint any location in the world, and it will overlay the direction of the sunset, sunrise, moonset, and moonrise on a map. This is an easy way to find out whether you have to get up early or stay up late.
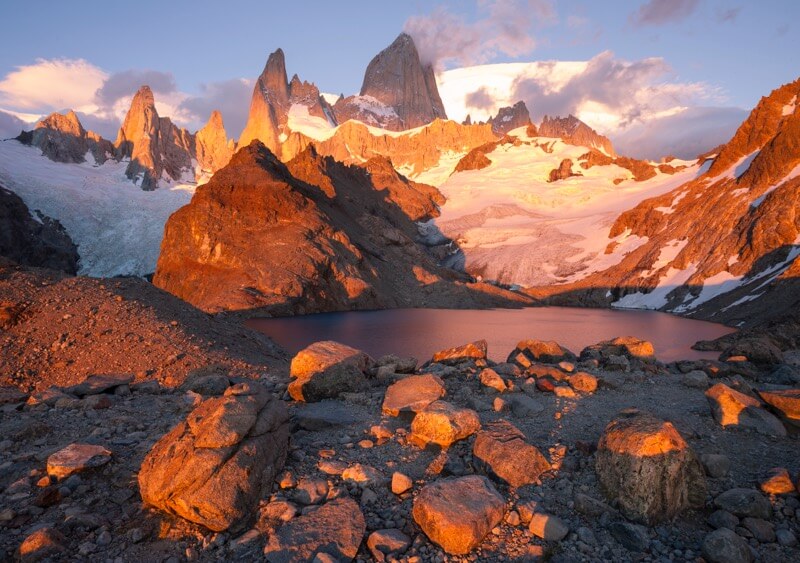
Lago De Los Tres and Fitzroy, Los Glaciers National Park, Argentinian Patagonia
Canon 5d Mark II 17-40mm Lens, 1/4th at f/16 ISO 50
It Changes Quickly
Light in the mountains, especially in places with high or low longitudes, does not last very long. Time and time again, I have been surprised by how fast the light can come and go. Weather changes fast in the mountains and the light does so too. Often clouds come in and it seems impossible for the sun to peek through. Nine times out of ten, nothing will happen and you will go home disappointed. I have seen photographers, pessimistic about the chances of a sunset, stand around with their gear still in their bags. When the sun does come out, those photographers miss the shot because they are busy trying to get their camera out during the short window of light. Therefore, the best advice I can give you is to set up your camera and wait it out.
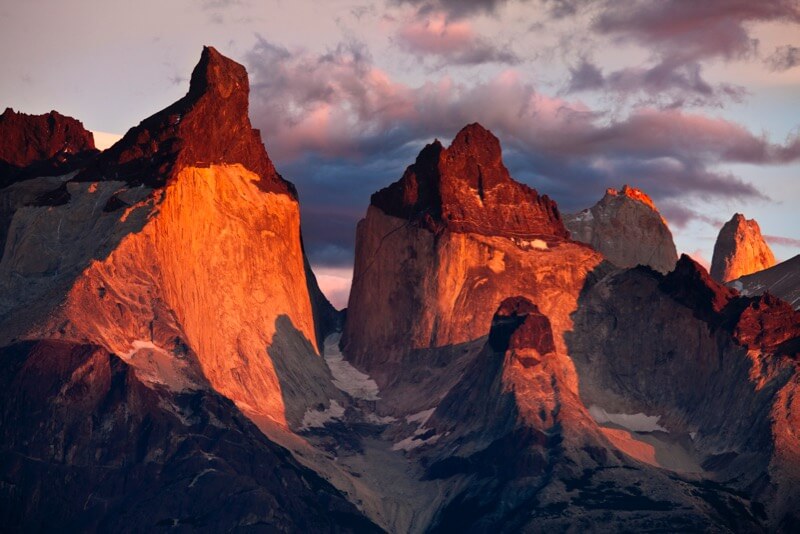
Los Cuernos, Torres del Paine, Chilean Patagonia
Canon 5d Mark II 70-200mm Lens, 1/25th at f/10 ISO 125
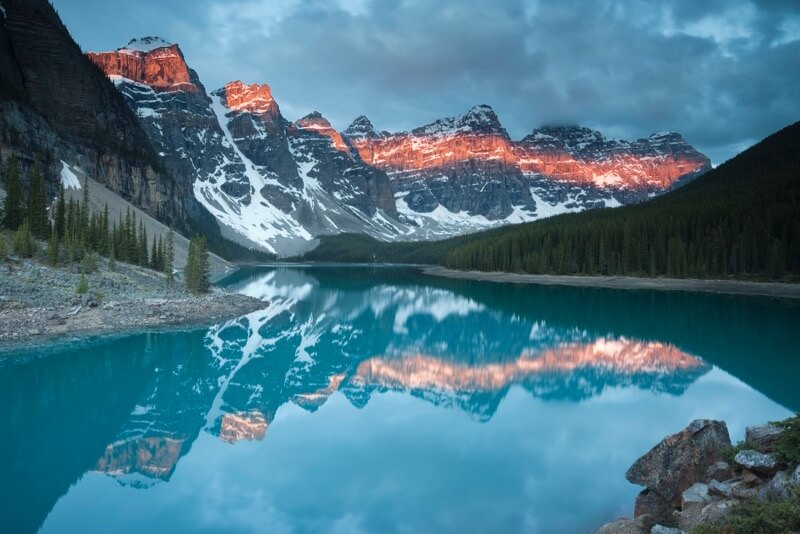
On this particular morning in the Canadian Rockies, I was sure that sunrise was a bust. Disappointed, I sat down on a rock resting my drowsy eyes. A few minutes later, I glanced at the peaks and noticed it seemed a little brighter in the middle of the mountains. I perked up and ran over to my camera. Within a few minutes, a beautiful band of light had illuminated the peaks above Moraine Lake. I worked quickly with my camera to grab as many frames as I could before the light disappeared. Almost as quickly as it came, the light was gone. I was glad I had prepared my setup; otherwise I would have missed this amazing moment.
Moraine Lake, Canadian Rockies, Alberta Canada
Canon 5d Mark II 17-40mm Lens, 1/10th at f/16 ISO 50
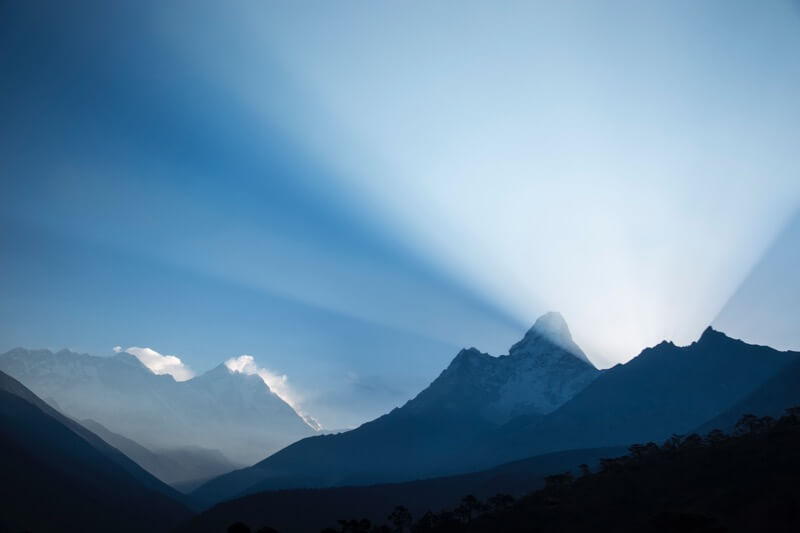
Even if a mountain is in an ideal sunset or sunrise spot, you shouldn’t ignore the other part of the day. It is possible that you can get a good shot at sunrise, even though traditionally the mountain is in a sunset spot. The clouds in the sky, for example, can be illuminated by the sun behind the mountain. Or sometimes, with the right atmospheric conditions, a “godbeam” can be created. That is what happened one morning at Ama Dablam in Nepal. I got up early, despite knowing that Ama Dablam wouldn’t get direct sunlight, and was rewarded with this rare scenario.
Ama Dablam, Everest Region, Himalaya, Nepal
Canon 5d Mark III 24-105mm Lens, 1/250th at f/6.3 ISO 50
Visualize the Scene
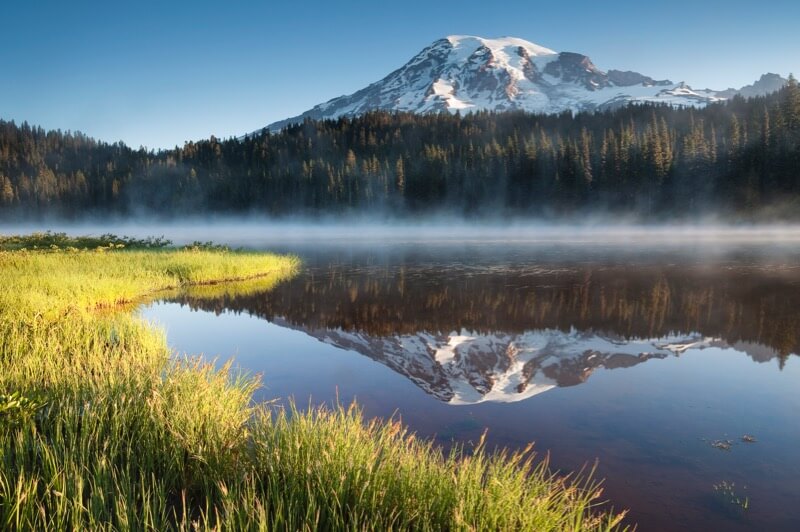
While light on a high peak is great, sometimes it is worth waiting for light to strike another element of the frame, because it can really make the photo come alive. When you arrive at a location, it is important to visualize how the light will fall across the landscape. This will give you the opportunity to shoot multiple compositions as the sun moves across the sky. When I arrived at this location in Rainier National Park, I saw these grasses and knew they would make a great foreground. They would look flat without the sun directly backlighting them, so I waited for the sun to rise high enough. As soon as the sun illuminated the grasses, the scene came alive and I was able to make this image.
Mt. Rainier, Rainier National Park, Washington
Canon 5d Mark II 17-40mm Lens, 1/60th at f/18 ISO 50
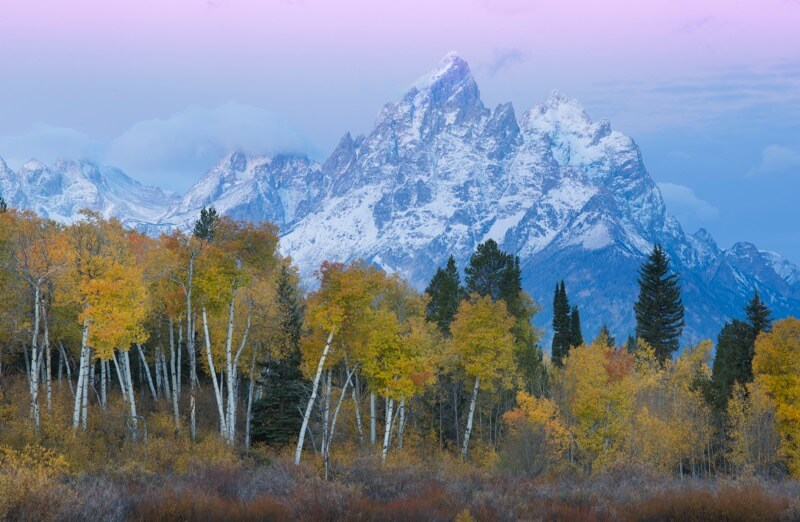
I am always looking for that bright, colorful and dynamic sunset or sunrise. Sometimes you get those, but most of the time you do not. If luck is not in your favor and the clouds do not align, that does not mean it is impossible to make a great image. One advantage in the mountains is the earth’s shadow. On clear nights, the shadow of the earth will be projected in the sky opposite of the sunrise or sunset. This shadow is a blue band of sky with a subtle pink band above it. It usually appears about 15 minutes before sunrise or after sunset. This phenomenon is more pronounced at higher elevations. It is a great way to give a soft, pastel atmosphere to your photos.
Grand Teton, Grand Teton National Park, Wyoming
Canon 5d Mark III 70-200mm Lens, 1 sec at f/16 ISO 100
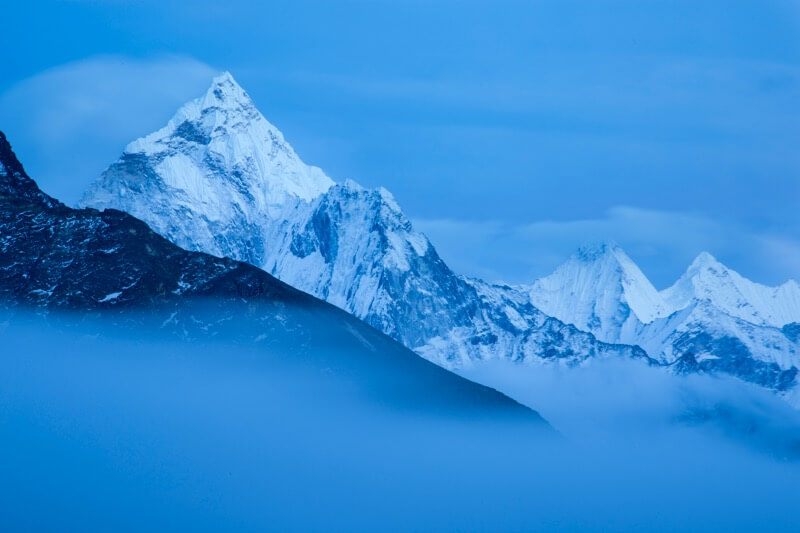
When clouds and fog obscure the view and block the sun, there is usually one last chance to walk away with a good photo: the blue hour. The blue hour is a time of day before sunrise and after sunset when there is just enough light in the atmosphere to light up the landscape. As temperatures change, sometimes the clouds and fog will start to clear before it gets too dark or too light. The light during this time is extraordinarily blue and your image will be filled up with blue tones, which can give the landscape an interesting look. While trekking through the Himalayas in Nepal, clouds obscured almost every sunset, leaving me to photograph the blue hour most nights as the fog cleared.
Ama Dablam, Everest Region, Himalaya, Nepal
Canon 5d Mark III 24-105mm Lens, 30 sec at f/7.1 ISO 100
The Best Light
One lesson I have learned early on is to shoot all the way through a sunrise or sunset. Preconceived ideas of when the “best” light is can often get in the way of perceiving and capturing the best possible image. The best light is not always the most colorful; sometimes it is the soft light that is the most dramatic and works better. When I shot on film, I had a limited number of images I could take and would shoot the most images during peak light and only a few before and afterwards. After development, however, I realized that I liked the later (or earlier) light better. Now with digital photography we have the opportunity to shoot as many images as we want and sort out which frames work the best later. Take advantage of this and make images all the way through the different stages of light; you might be surprised by what you get.
Below are two examples of similar shots I made one morning in the Cordillera Huayhuash in Peru. After taking the first photo, I remember thinking that I had already got the shot I wanted with the colorful clouds and I began to pack up to go grab some breakfast. On the way back to the camp, the light and clouds had changed considerably. I took my camera back out and made the second image. When I got home I realized that the second image had much more drama in it and was much more captivating. It was a good reminder to me that my preconceived ideas are not always right!
Cordillera Huayhuash, Peru
Canon 5d Mark II 70-200mm Lens, 1/50th at f/5.0 ISO 50
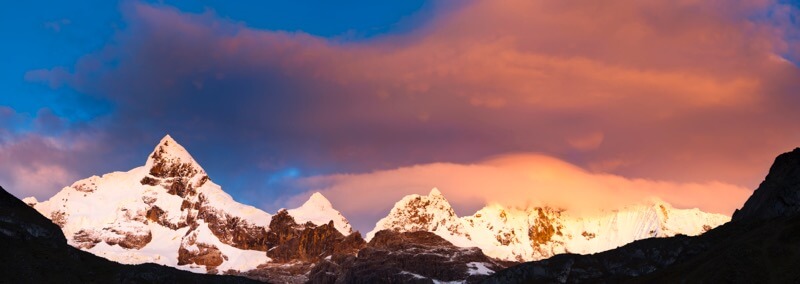
Cordillera Huayhuash, Peru
Canon 5d Mark II 70-200mm Lens, 1/320th at f/8.0 ISO 50

In most cases, light is the element that ties a photo together. Generally, the photograph contains a subject (a mountain, a person, a lake, etc.), which is set off by a secondary element (light, colors, textures, etc.). This does not mean that light is optional—it is just a recognition that light is usually a secondary subject in a photo. With that being said, there are times when light can be the primary subject of a photo. For example, when there is a rainbow or big colorful sunset, the extraordinary light becomes the main subject, and the secondary elements are the surroundings. The best way to make something the main focus of an image is to use space to create emphasis.
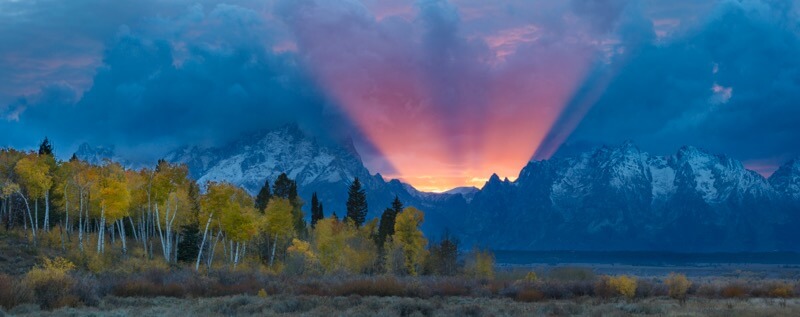
While in Grand Teton, I was presented with an incredible light situation. As I drove in a frenzy to get to a certain location in time, the sun broke through the clouds creating the most vivid beam of light I have ever seen. I quickly surveyed the scene: clouds obscured the Grand Teton and there was a nice little grove of aspens, but the first thing I realized is that the beam of light was the most important element. I composed the panorama to feature the light beam and let the snowy mountains and yellow trees become a secondary element to the amazing light.
Teton Godbeam, Grand Teton National Park, Wyoming
Canon 5d Mark III 70-200mm Lens, 1/25th at f/14 ISO 400
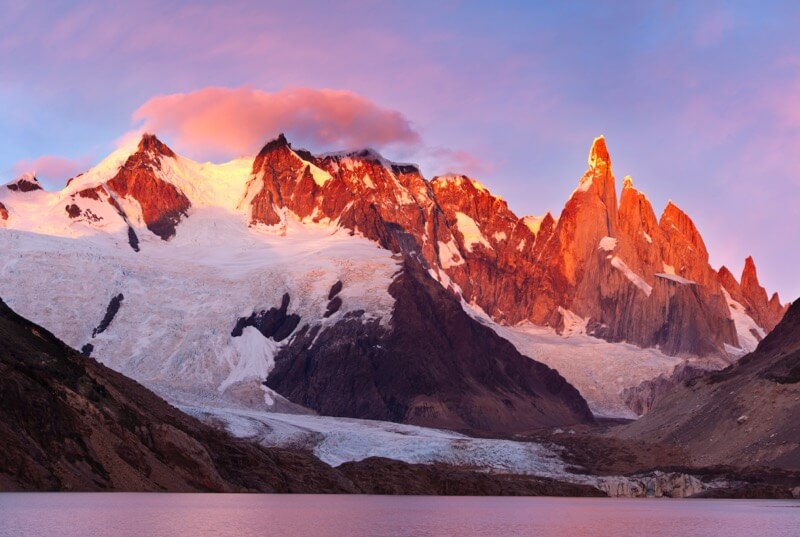
Despite all the planning and preparation, sometimes all you need to witness great light is patience and lots of time. I am lucky to be able to spend more time at locations than most people, but if it is possible, I would encourage you to plan a few extra days at each location to give yourself a better chance of catching great light. Eventually it will happen! Sometimes it happens right away, and other times, like here at Cerro Torre in Argentina, it can take eight days of waiting before there is a great sunrise.
Cerro Torre, Los Glaciers National Park, Argentinian Patagonia
Canon 5d Mark II 70-200mm Lens, 2 sec at f/16 ISO 50
Check out part 3: Composition Tips
See more of Grant Ordelheide’s work on his website.

