When snow begins to fall, you might not think that now is a phenomenal time to break out your camera and take photographs. But it is. The snow, like the rain, can give you unique scenes and beautiful subjects to photograph.
However, snow also comes with some challenges. Your photos can end up colorless and disappointing if you don’t use the right techniques. For a higher chance of success, check out the following tips.
Adjust Your Exposure
Snow is white (duh!), so your photos will have a predominant, highly reflective background throughout. To get stunning photos, you need to take this into account and adjust your exposure.
To expose correctly, you need to expose specifically for the darker subject(s) you have in your frame. Birds, people, and animals are all much darker than the snow. In many cases, your TTL (Through-The-Lens) meter will flub the photo. The most “accurate” exposure registers at 18% Gray, so your whites will likely be underexposed if you trust the meter.
When you’re shooting with a large expanse of white as your background, you need to make an adjustment. For bright white snow, you’ll need to open the aperture at least 1/3 of a stop. If your eye is trained, it’ll be easy to see the positive effect of this adjustment.
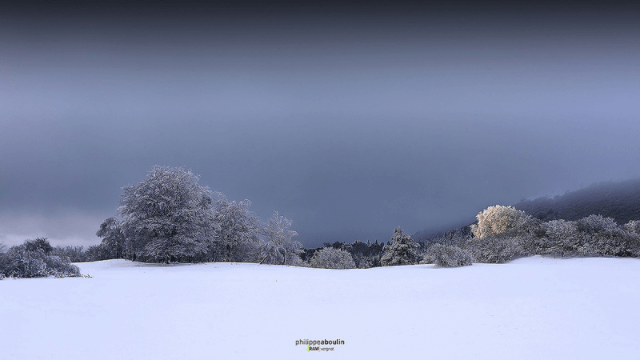
Philippe ABOULIN – A touch of light.

Metering
You don’t want to trust the camera’s matrix light meter mode too much. Instead, when shooting in the snow, use the Spot Meter (less than $20 on Amazon). Or, if you don’t have a spot meter feature, use center-weighted metering. Use it for the most important part of the image, the part needing the most accurate exposure.
If your photo is predominantly snow and ice, you might get away with using the center-weighted meter mode alone. Keep in mind, though, that you might miss some of the rich details and texture of the snow.
In any case, you’ll want to examine the histogram or the negative to see if the whites are clipping. If so, adjust your exposure (shutter speed and/or aperture) to reduce the amount of clipped whites. You’ll always get some because of the sun’s power, even on an overcast day, but try to reduce them as much as possible.
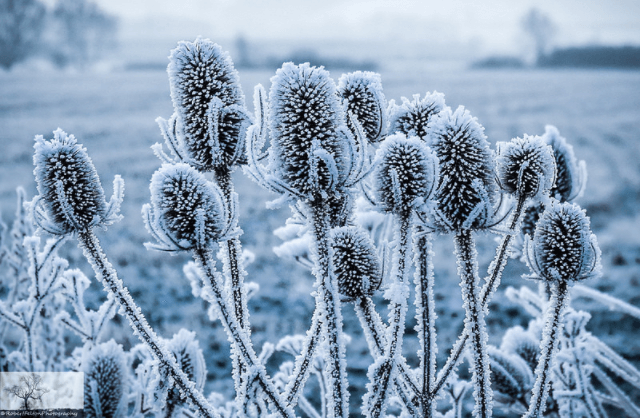
Robert Felton – Frosted Teasel

Light Source
In addition to the f-stop compensation, it’s crucial to pay attention to your light source(s). Note where your subject is positioned relative to the main light and reflecting light. It’s easy to underexpose subjects when the area behind and in front of the camera is a gleaming white. It’s similar to a studio setting with a white cyclorama, but more intense.
Depending on the subject, you’ll want to blow out the white, snowy background to get a “proper” exposure. You might lose the snow highlights and a considerable amount of shadow detail, but at least you’ll have a good exposure.
If your camera allows you to adjust the color temperature in increments, you can either cool down or warm up your photographs. But even if you can’t make these minute adjustments, you can set the White Balance for tungsten and shoot outside in the daylight. Then, your images will be tinged with a blue “cooling” cast, most notable in the shadows of snowy backgrounds.
If you’re one of those people who still shoots film, here’s a quick tip for evocative images. Load tungsten-balance slide film into your camera, photograph your subject(s) in the snow-filled setting, and cross-process the film when you’re done. You’ll notice that water will have an unusually blue-black color that is velvety, endless, and reflective.
Of course, you could always do an HDR photo if you’re photographing a snowy landscape or still life. But that’s another discussion…
The above photos were selected from our Flickr group. Take a fantastic snow picture? Share it with the group so we can admire your work!


