Even though steel wool photography is a relatively new art form, it has quickly gained popularity for its unique and beautiful results. This type of photography is perfect for anyone who wants to create stunning images that are sure to wow viewers. If you’re looking for a new challenge or simply want to try something different, steel wool photography is definitely worth considering. The following article by guest writer, Gim Liu, will give you some great tips and inspiration for getting into steel wool photography.
Notice of liability/Disclaimer – The information in this article is distributed on an “As is” basis, without warranty. While every precaution has been taken in the preparation of this article, neither Gim Liu nor Exposure Photography Magazine shall have any liability to any person or entity with respect to any loss or injury or damage caused or alleged to be caused directly or indirectly by the instructions contained in this article or by the equipment described in it. All readers are advised to proceed entirely at their own risk.
About me and this article
My name is Gim Liu from the UK and Hong Kong. I’ve been a photographer for over 10 years since buying my first DSLR camera in 2009. For me, it turned from a hobby to an obsession and lifestyle. My perception of photography is that it is like art and poetry. Along with capturing moments, it can and should be used to express yourself. Long exposure photography does exactly that, it gives you the ability to create and capture something unique in an artistic way.
The beauty of it is that you are restricted only by your own imagination and creativity. It is my favourite type of photography because it brings out my creative side and because I am forever fascinated by the vibrant colours and the different light streaks/trails produced by the camera.
The main community I am part of where I have a strong presence and a considerable following is Instagram. Since 2015, I have attracted a large following of 12,000+ supporters who appreciate my talent and value my artistic creativity. This is the platform I predominantly use to display my photography. If you are interested to find out more about me, what I do and see my work, visit my Instagram page https://www.instagram.com/gimagery_/ or my website www.gimagery.net
In this article, I am spreading knowledge about steel wool photography. It is by no means a new style of photography but it is neither one that is widely used by photographers nor one where the process is generally known. Here I introduce Exposure Photography Magazine’s readers to steel wool photography and reveal what it involves.
The information found in this article regarding the steel wool photo type is exclusive to Exposure Photography Magazine and is also featured in greater detail in my book ‘A Beginner’s Guide to After Dark Photography with Gimagery’ which is described when this article concludes.
What is steel wool photography?
It involves using a long exposure to capture the motion of hot embers flying through the air. It is achieved by setting fire to a material called steel wool that is sitting inside a metal whisk which is attached to a chain and then spinning it. Once alight and spun around, the glowing hot embers fly out and create orange/gold streaks of light which is captured. The effect that is produced is somewhat similar to the effect created by a Catherine Wheel firework. This technique produces eye-catching images and makes an interesting experience. The beauty of it is that no photo looks the same and it is open to be experimented with to create unique photos.
Steel Wool Photography Examples
Here are eight of my finest steel wool photos:
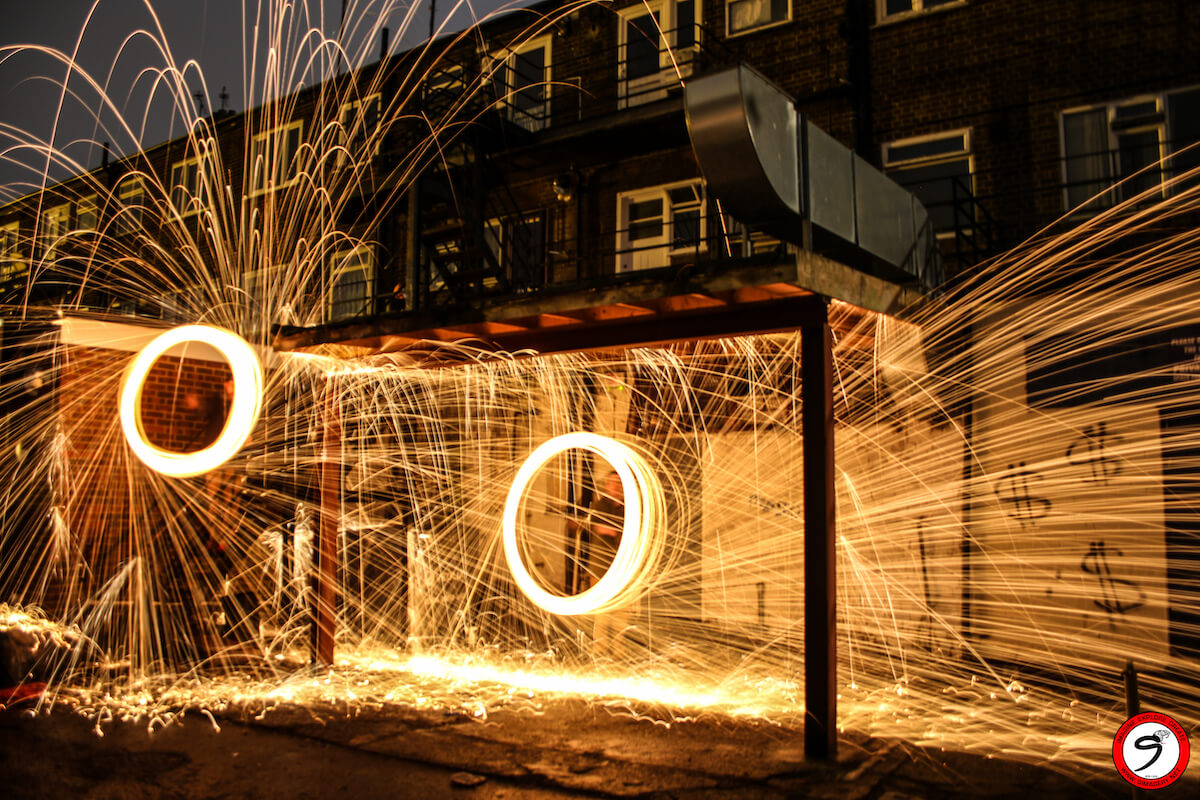 ISO 100, Aperture 3.5 and Shutter Speed 10 seconds
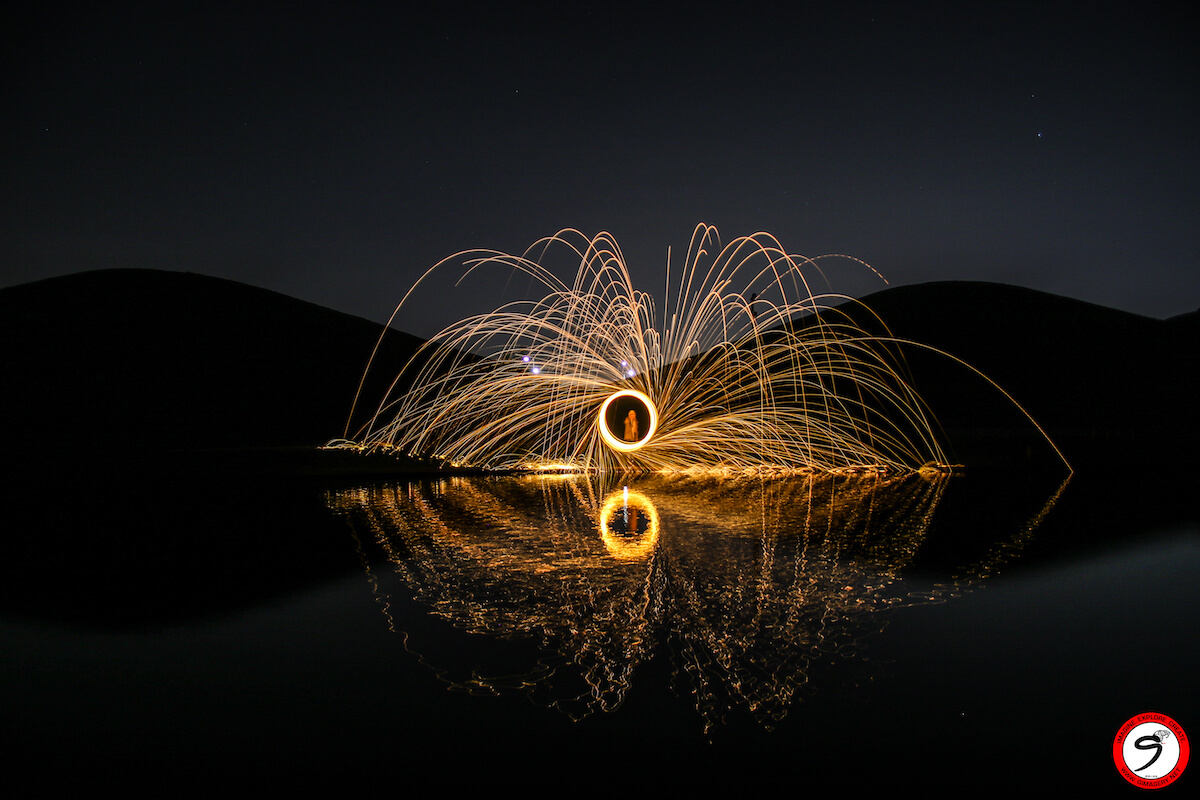 ISO 100, Aperture 3.5 and Shutter Speed 6 seconds
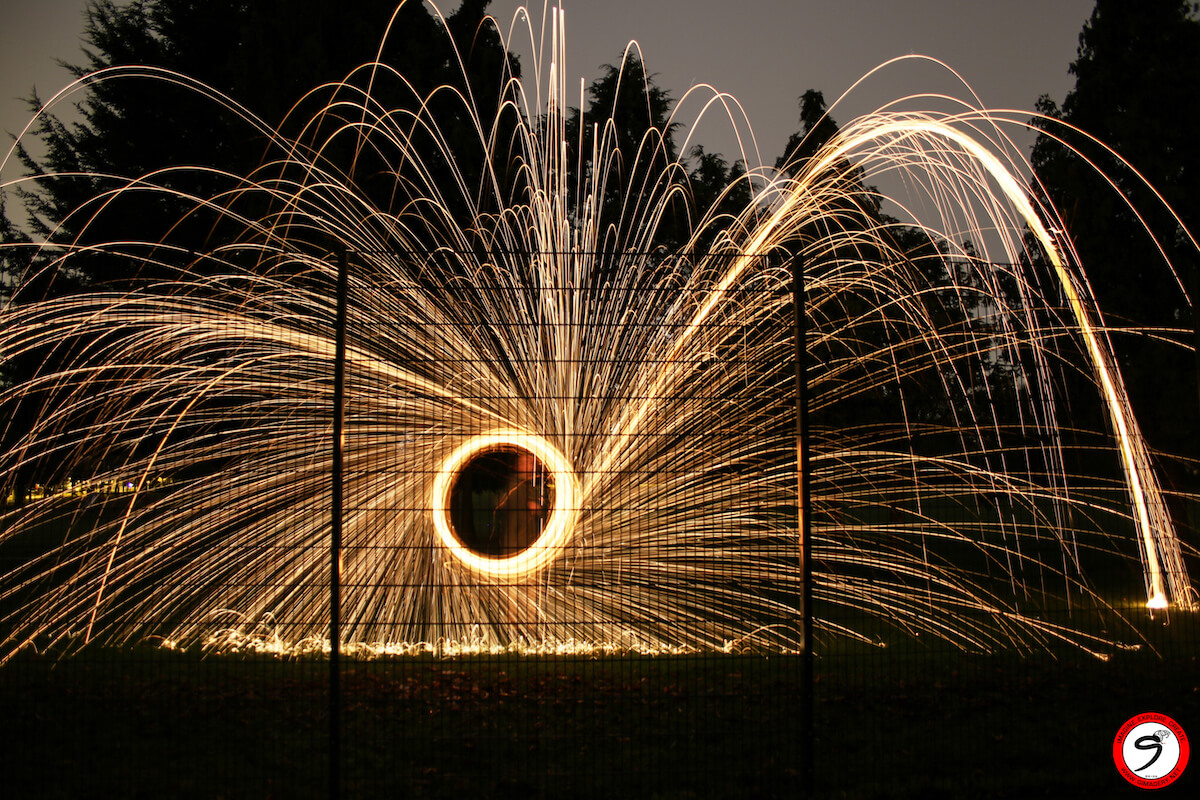 ISO 100, Aperture 3.5 and Shutter Speed 13 seconds
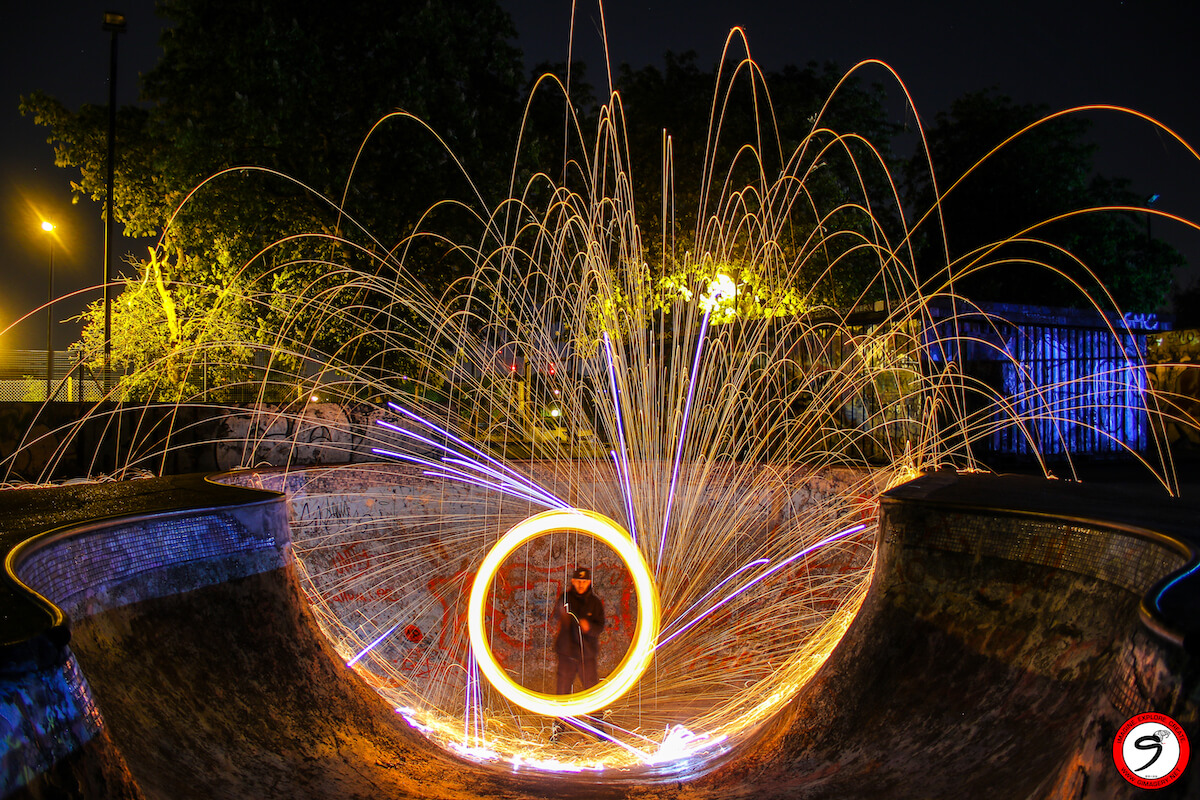 ISO 100, Aperture 3.5 and Shutter Speed 10 seconds
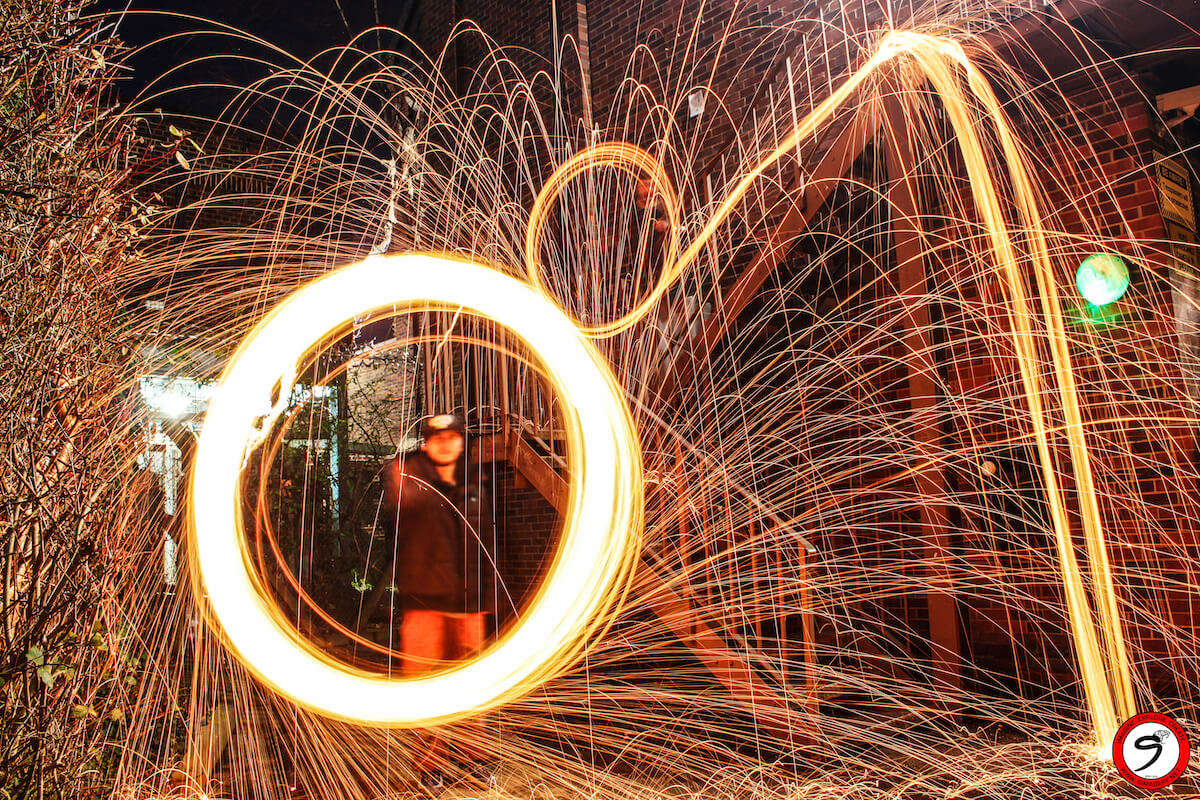 ISO 100, Aperture 7.1 and Shutter Speed 30 seconds
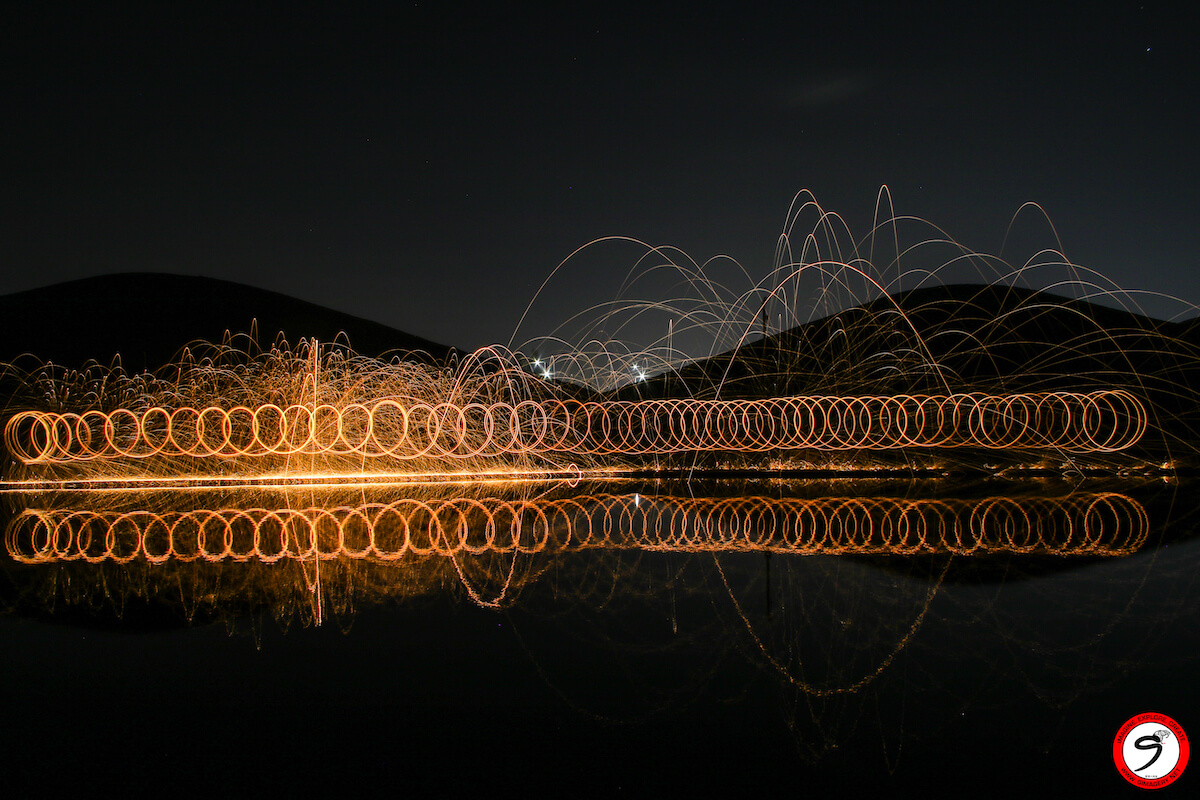 ISO 100, Aperture 9 and Shutter Speed 25 seconds
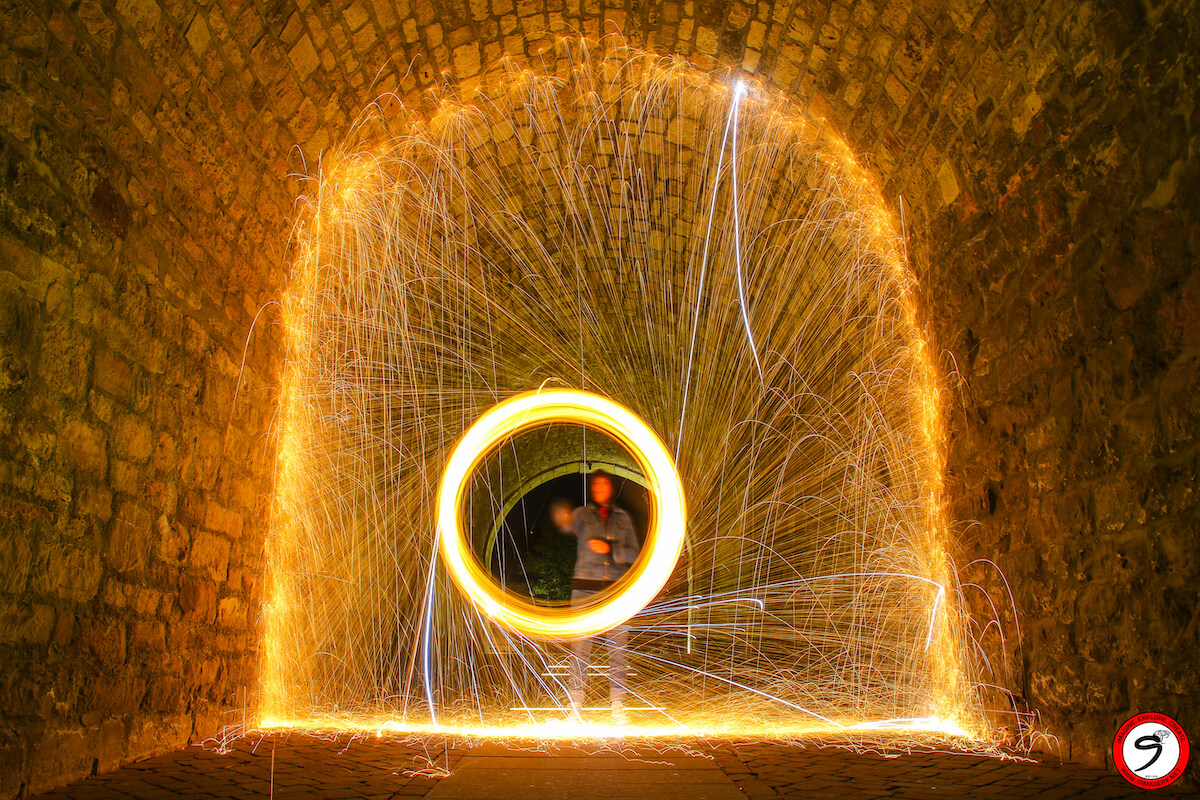 ISO 100, Aperture 8 and Shutter Speed 10 seconds
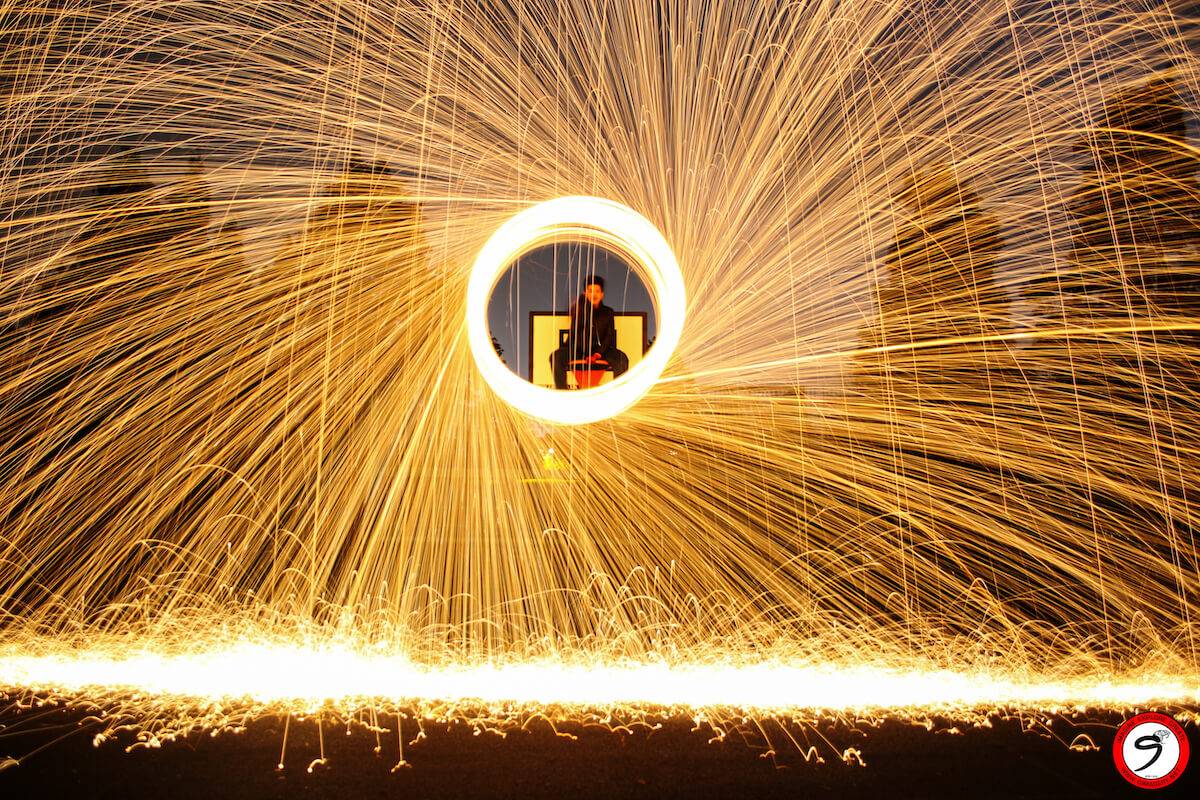 ISO 100, Aperture 3.5 and Shutter Speed 13 seconds
Tools and safety
The steel wool device is the main tool used and is comprised of four different components; steel wool, toilet paper, metal whisk and a dog lead which needs to be assembled.
Steel wool is a bundle of thin steel wire normally used as a metal sponge for cleaning/polishing which creates the sparks that are captured in a photo. It can be purchased in your local hardware store, supermarket or on the internet. It is available in many grades but the finer grades work better. The grades are labelled in either words or numbers. Purchase the finest grade available to you. The finest grade of steel wool is labelled in words as ‘finest’ or in numbers as ‘0000’.
A metal whisk holds the steel wool and the gaps allow the steel wool to fly out. Two imperative characteristics it should have are; it must be metal and it must have a loop at the end of the handle for a dog lead to be attached to it.
A dog lead needs to be attached to the bottom of the whisk to enable you to swing the steel wool device around. Alternatively you could use something else such as a lanyard, rope or chain. However, a dog lead is recommended because on one end it has a clasp making it easy to attach to the whisk and on the other end it has a handle which is convenient to hold.
These three components and some toilet paper form the steel wool device. The graphic below shows in five steps how they are put together. A written description follows.
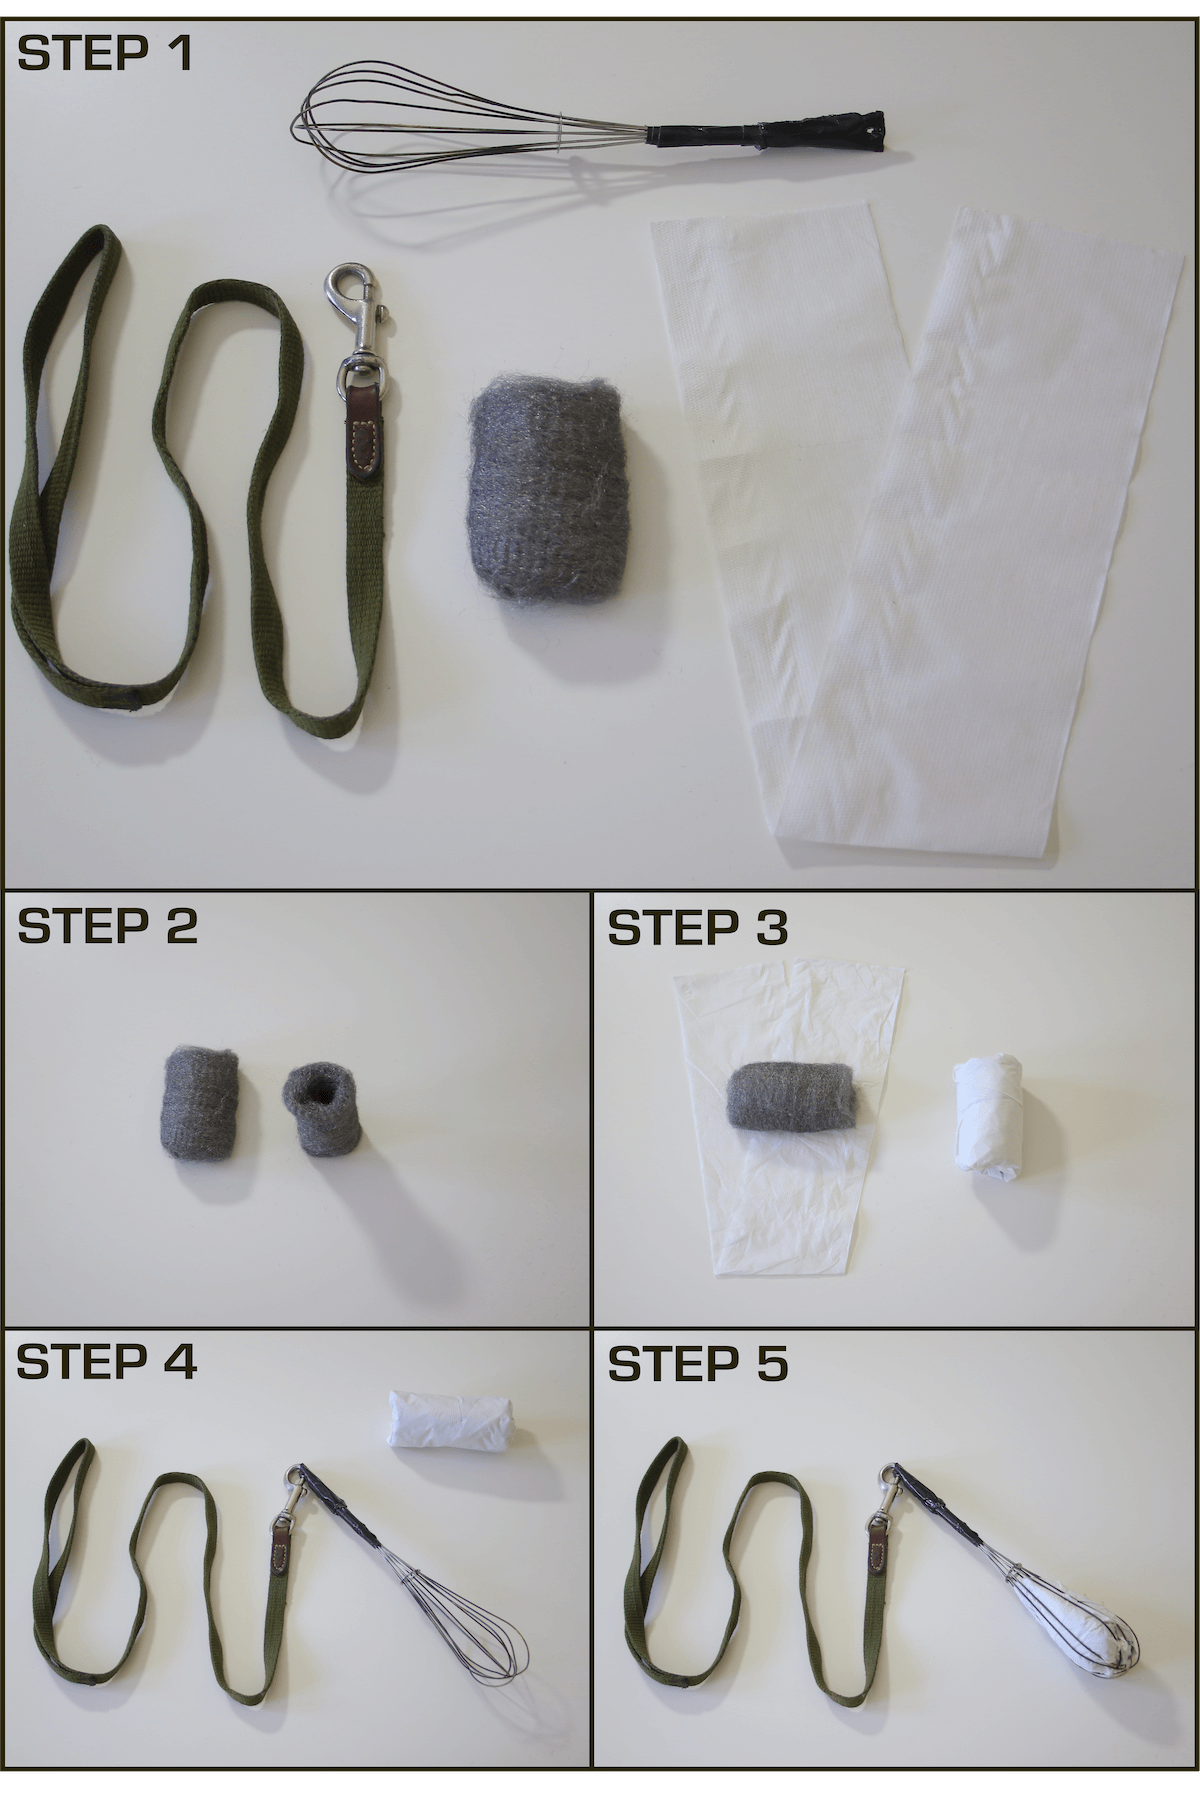
- Step 1 – Gather your steel wool, toilet paper, metal whisk and dog lead together.
- Step 2 – Gently loosen and fluff up the steel wool. After that, hollow it out so it looks like the piece of steel wool on the right to maximise airflow and to help it burn better.
- Step 3 – Wrap the steel wool in the toilet paper and tuck in the excess.
- Step 4 – Use the clasp on your dog lead to attach it to the loop at the end of your whisk. Step 5 – Take the steel wool wrapped in toilet paper and put it inside the whisk.
Steel Wool Safety Precautions
Before proceeding, safety precautions must be discussed. When these safety precautions are not taken, there is a risk of harm to yourself and/or others and also damage to property and/or possessions.
Wear protective clothing. Choose clothes that will provide maximum protection (leaving no exposed skin) and are made out of natural fibres such as cotton not synthetic materials like nylon and polyester. Specifically you should wear; a hood and/or hat to cover your head and hair, safety goggles/sunglasses to protect your eyes, gloves to protect your hands, long trousers to protect your legs, hoodie/jacket to protect your top half and fully enclosed shoes.
Choose a sensible location. It must be outdoors and have no flammable materials nearby whatsoever. Somewhere with a concrete floor is appropriate along with being in a secluded/remote area. Doing it in a place where people are not around is important because you do not want to injure anyone. Also you do not want to be disrupted by law enforcement due to their curiosity of wanting to know what you are up to.
Later is better. The photo needs to be taken when it is dark for the effect to work. These kind of photos attract the curiosity of people so avoid busy times. Going after 9pm will lessen the chances of getting interrupted. Additionally, an advantageous time to go out is when the ground and surrounding are wet (after it has rained) which reduces your risk of causing a fire.
Bring an extinguisher with you. Bring something that can extinguish any flames/embers or the start of a small fire. This can be in the form of an actual fire extinguisher or a sufficient amount of water.
Check before leaving. Don’t leave location immediately after finishing. Walk around the site to carefully check the entire area to be certain nothing is burning.
Take care whilst spinning. The sparks can fly out up to 13 metres to the left, right and above. Ensure you have left plenty of space between you and anyone/anything nearby. If you do not, you risk causing damage or injury.
Two final precautions. First, always make sure that the whisk and dog lead are attached firmly. Second, ensure that you have put the lighter fluid safely out of the away before commencing.
How exactly to do it with settings
Here is where the fun begins! The following is a guide for you to follow to create your own steel wool photo. It is outlined in four phases which are; plan, setup, execute and analyse.
Phase one involves all the necessary planning needed to be done. Specifically, you need to think about what kind of steel wool photo to create, where to do it and what equipment you need.
Firstly, decide on what kind of steel wool photo would you like to create. Perhaps one that has a rebound? a reflection? a double spin up? or something plain and simple? You can take
inspiration from the photos found under the ‘what is steel wool photography?’ section to come up with your idea.
Secondly, you must decide on the location. It needs to be somewhere that has low levels of artificial light and where the backdrop will enhance the attractiveness of the photo.
Steel Wool Gear and Equipment
Lastly, you need to gather all the equipment needed to create the photo:
- Steel wool device
- Additional steel wool for further shots
- Lighter
- Lighter fluid
- Wireless camera remote or a friend
- Torch
- Tripod
- Camera
Phase two involves setting everything up at the location to take the photo. This includes deciding on the positioning of the camera and where you will be, set the different settings on your camera, sorting out the camera focus and taking test shots.
Firstly, decide where you will position yourself to spin the steel wool. Once chosen, remember this place or put something down to mark it. Now decide where you will position your camera to capture the image. It should be placed on top of your tripod at least six metres away from your chosen spinning position. Your camera frame must be set up to see the entire area of where you will spin the steel wool. It is important to consider the steel wool will fly outwards and upwards so leave enough space in the frame to see this.
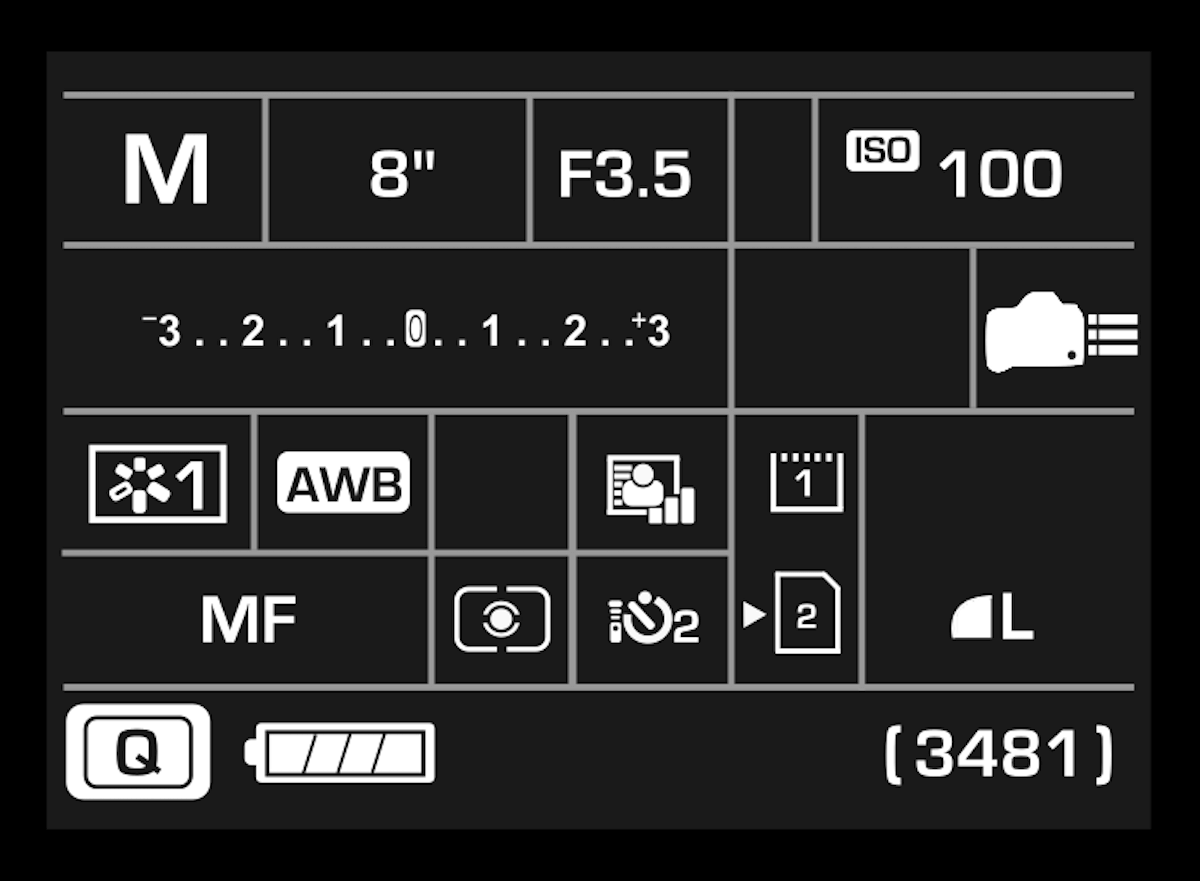
Secondly, your camera settings need to be set. First put your camera into manual mode then set the ISO to 100, set the aperture to 3.5, set the shutter speed to 8 seconds and set your camera to self timer/remote mode. The settings provided are a starting point and can be adjusted accordingly later. Try these settings first but you will need to play around with the aperture and shutter speed to find what works best for the lighting at your location and your spinning.
For the initial settings, your camera screen should look something like this:
Thirdly, your camera focus needs to be set. Use your camera’s autofocus to focus on the central area of the frame or the general area of where the spinning will occur. After this has been achieved, turn your camera onto manual focus. A torch can come in handy here. If you have a friend with you, get them to stand with a torch where the spinning will happen and point it at the camera. While this is being done, use the autofocus button to focus on the light of the torch. If don’t have a friend with you, simply use a torch to light up the central area of the frame then use the autofocus button to focus on it then turn your camera onto manual focus.
Lastly, test shots need to be taken to determine your camera is in focus and to establish the camera settings are producing a photo that is not too light but rather dark. After viewing your test shot, if the photo is not clear, adjust the focus until you get a photo that is clear.
Additionally, if the photo is too light or too dark, adjust the aperture from the initial camera settings provided. Before moving on you should get a photo that is in focus and appears rather dark. The light produced from the steel wool will make your photo significantly lighter.
Phase three involves performing the action needed to create the photo. There are five steps to take prior to spinning the steel wool for the photo:
- Stand in the chosen position with the steel wool device.
- Cover the toilet paper that the steel wool is wrapped in with lighter fluid and light it.
- Let it burn for one minute. Twist and turn the steel wool device so the whole area burns.
- After one minute of letting it burn, swing it in a circular motion to test if the steel wool flies out of the whisk. If it doesn’t, wait for it to burn enough so that steel wool flies out. If needed, cover it in lighter fluid again and relight.
- Wait until you test that the steel wool is flying out of the whisk before taking the photo. When the test is successful, stop and set off the self timer by remote or manually on the camera.
Once the camera has started taking the photo, proceed in swinging the steel wool device in a circular motion.
Here are three important points regarding the execution:
- The steel wool device must be swung in a circular motion with enough power to propel the steel wool out of the whisk.
- Swing a circle with a diameter of approximately 144cm. This is slightly above head height and slightly below waist height.
- Hold the lead attached to your whisk approximately 38cm from the bottom of the whisk.
Phase four involves analyzing your photo to recognize any adjustments needed to be made to the camera settings or mistakes that can be corrected in further attempts.
Possible adjustments could be a combination of the following:
- Distance from the camera – you may need to move closer or further away from the camera to fit everything in the frame.
- Focus – the photo/s taken might be blurry and you may have to refocus.
- Too bright – the photo/s you took might be too bright. In order to fix this problem, decrease the power and speed of swinging or either decrease the shutter speed slightly or increase the aperture.
- Too dark – the photo/s you took might be too dark. To fix this, increase the power and speed of swinging or either increase the shutter speed slightly or increase the ISO. If you choose to increase the ISO, try not to go above ISO 400.
If you needed to make any of these adjustments, repeat phase three and phase four until you are pleased with the photo you have created.
Further exploration
I hope that you found reading my guest post interesting, it has inspired your creativity and you end up creating some fantastic photos.
If you liked what you read and are interested to explore the world of long exposure photography further, I have just released my debut book ‘A Beginner’s Guide to After Dark Photography with Gimagery’ on Amazon. It enlightens the reader to the discipline of long exposure photography in a way that has never been done before. It provides in-depth step-by-step guides with interactive running examples on how to take five different types of long exposure photos. These five photo types are light painting words, vehicle light trails, steel wool, outlining and trajectory. After reading this book you will be left fully equipped with the skills to create unique and captivating photos.
If you want to develop yourself further as a photographer, learn new techniques and be able to take epic photos such as those found on the book cover below, this publication is perfect for you!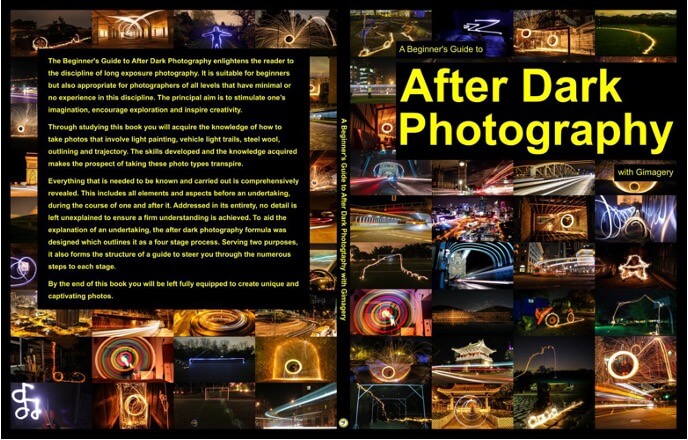
Click the link here to be redirected to order your copy from Amazon today. You can also check out the video trailer here:
