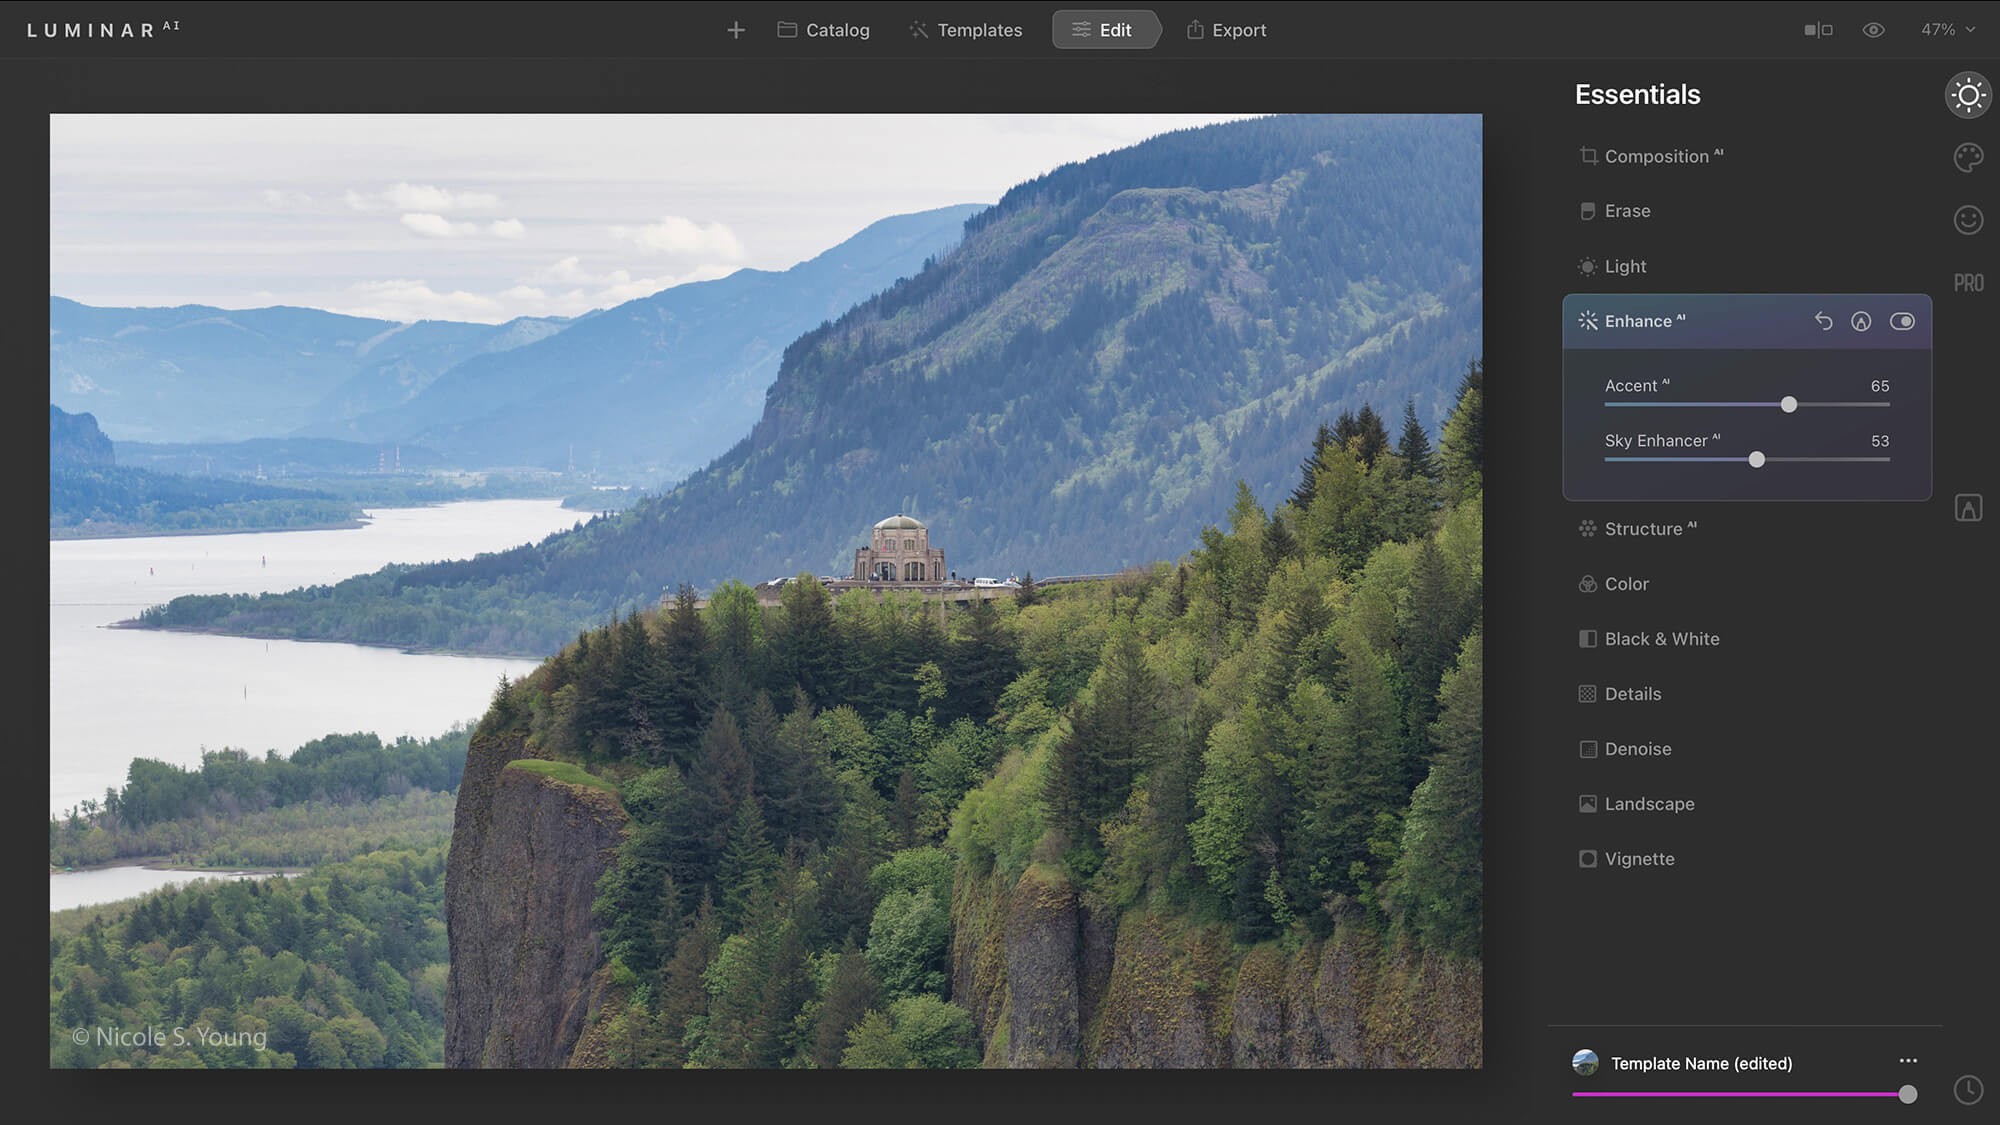
We all want our photographs to look beautiful, but after a trip or a day out with the camera, it can be easy to import the files to your computer and forget about them. I know I have folders full of digital photos that have barely seen the light of day! It can take so much time to go through all your photos, pick out the best ones, and edit them to perfection. However, there are ways to speed up the editing process, and LuminarAI is a perfect fit when you want to process professional-looking images quickly and efficiently. To help you work through your backlog of unedited photos, I’ve put together 10 creative photo editing tips that you can start using today.
10 Creative Photo Editing Tips That Save You Time
- Get Started with a Template
- Quick and Easy Cropping
- Improve Lighting and Contrast
- Fix Color Casts
- Add Atmosphere
- Fix a Boring Sky
- Stylize the Color of a Photo
- Quickly Edit a Portrait
- Remove Unwanted Objects
- Add a Beautiful Finishing Touch
Tip #1: Get Started with a Template
Sometimes you open a photo to process it but you don’t know where to begin. One feature of LuminarAI is the ability to look at your photo, identify its contents, and recommend edits using a Template. For example, if you have a portrait image, LuminarAI will see this and suggest a Template that applies adjustments specifically for a portrait. After applying a Template, you still have full creative control to change and adapt the edits to your personal style — or even to remove some of the tools that were applied. Templates in LuminarAI are meant to help you save time and get your photo off to a good start.
Tip #2: Quick and Easy Cropping
The composition of a photograph is almost as important as the subject matter itself. In fact, it can be argued that good composition makes a good photograph, regardless of what’s in the scene. One handy tool within LuminarAI is CompositionAI. This tool allows you to manually crop, rotate, and align an image. You can also easily crop an image using the CompositionAI button, which makes the tool examine your photo using an AI algorithm and suggest a cropping solution. If you wish to make additional changes after using CompositionAI, you can simply use the sliders and other buttons to fine-tune the image to reflect your personal style.
Creative Photo Editing Tips – #3: Improve Lighting and Contrast
Many images can be improved by adding brightness and contrast during post-processing. In LuminarAI, there’s an easy-to-use and effective tool to do that, and it only takes a few seconds! The AI-driven AccentAI slider — located in the EnhanceAI tool — instantly adds brightness to the shadows, darkens the highlights, and increases the contrast. You can apply this same slider to different photos and it will behave differently, basing its edits on the contents of each photograph.
Sky EhnancerAI Slider
Also inside the EnhanceAI tool is the Sky EhnancerAI slider. This is similar to the AccentAI slider, but it only affects the sky by making it darker so it stands out if it was originally too light. LuminarAI will automatically make this slider active (or inactive) depending on whether it finds a sky in the scene.
Tip #4: Fix Color Casts
Not all photos have the best color straight out of the camera. And if you have scans of old photos, it’s likely they’ll be showing some signs of aging, which oftentimes gives an image a color cast that dulls the original colors in the photo. Inside of the LuminarAI Color tool is a slider called Remove Color Cast that will help you quickly remove any unwanted color wash.
Creative Photo Editing Tips – #5: Add Atmosphere
A little bit of fog can add a beautiful amount of depth. But because fog can be unpredictable, it can be difficult to photograph. However, if you have an image that could use a touch of mist or haze, look no further than the AtmosphereAI tool. It adds fog or mist to a photo and even masks objects in the foreground and background to give the effect more depth.
Tip #6: Fix a Boring Sky
It seems like the moment you want beautiful puffy white clouds in your photo is the moment all clouds disappear from the sky. Or maybe there’s a gorgeous sunset but not a cloud in sight that can absorb the light and colors. With the SkyAI tool in LuminarAI, you can easily drop in a brand-new sky and automatically replace the original boring sky.
Augmented SkyAI tool
Also, if you would like to add objects to your skies such as birds, the moon, or fireworks, you can do so quickly using the Augmented SkyAI tool. This allows you to place objects within your photo and will automatically mask them so they fit with the surroundings and don’t overlap objects in the scene.
Creative Photo Editing Tip #7: Stylize the Color of a Photo
Sometimes it’s fun to colorize a photo and make it look a little bit different than the view in person. Changing a photo’s colors can affect the overall mood and emotion the photo evokes. In LuminarAI, there are two great tools you can use to create this effect: the Mood tool and the Toning tool. The Mood tool allows you to use LUT (Lookup Table) files, which are data files that contain information about how to alter an image. LuminarAI comes with several LUTs pre-installed, but you can also import your own LUTs. Toning, on the other hand, lets you choose the specific colors you want to add to the shadows and highlights, allowing you to give the image a split tone effect. You can apply both of these tools to your photo for an even more exaggerated result.
Tip #8: Quickly Edit a Portrait
We want people in our photographs to look their best, but it takes time to refine facial edits in post. The Portrait tools in LuminarAI, however, make it easy. You can quickly adjust features like skin, eyes, lips, and teeth. These adjustments can take significant time to do manually, but only a few moments with the FaceAI and SkinAI sliders. Additionally, the BodyAI slider lets you adjust the shape of a body to make it slimmer or larger. This is helpful when you need to make a correction due to an outfit or clothing that’s excessively bulky and you lose the shape of the person you’re photographing, or to fix the shape due to a strange camera perspective.
Creative Photo Editing Tips – #9: Remove Unwanted Objects
If you have items in your photo that you don’t want to see, the EraseAI tool can help. This tool works for people, lens spots, and more. Using it is fast and simple: Just brush over the object you want to remove. The AI algorithm automatically senses the surroundings and seamlessly fills in the erased area with content that matches the scene.
Creative Photo Editing Tips – #10: Add a Beautiful Finishing Touch
All the Creative tools within LuminarAI can do wonderful things, and one of my favorite of these tools is Mystical. It adds a subtle amount of glow, color saturation, and contrast to a photo, but without making it look overcooked. It’s a perfect finishing touch to nearly any photo. Make this your go-to when you feel like your image needs one last polish.
Conclusion
I hope you enjoyed this collection of creative photo editing tips. If you’re interested in checking out the software I used for the images above, be sure to visit Skylum to get your own copy of LuminarAI and start making creative edits right away. You can use the following discount code and save $10 off the full purchase price: PHOTOARGUS.
About the author: Nicole S. Young is a professional photographer living in Oregon and the author of Food Photography: From Snapshots to Great Shots. In addition to food photography, Nicole focuses on landscape and travel photography as well as photography education. You can learn more about Nicole and view her portfolio on her website Nicolesy.


