This is part 3 of The Simple Guide to Photographing Big Mountains.
Part 1: A Simple Guide to Photographing Big Mountains
Part 2: The Right Light
Part 3: Composition Tips
Part 4: Star Images
Part 5: Adding People to the Scene
Composition Tips
One of the best photography tips I ever heard came from the late Galen Rowell. Rowell used to tell people that if it looked good, shoot it, if it looked really good, shoot it again. What this means is if you have found a subject that is at its aesthetic peak, shoot it over and over. If it is a great wildflower year, or the fall colors are peaking, or maybe a certain lake is full from recent rainfall, then don’t leave with just one or two photos of these locations. In photography, especially in the mountains, things can change quickly and it might be years and years before you see similar conditions. If it looks GREAT, shoot it again, and again, and again. You will not regret it, as it is possible you may never see those conditions again.
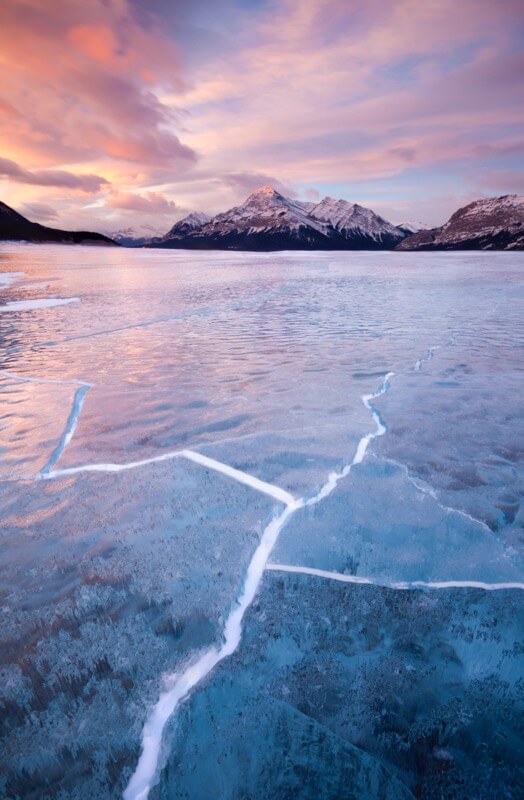
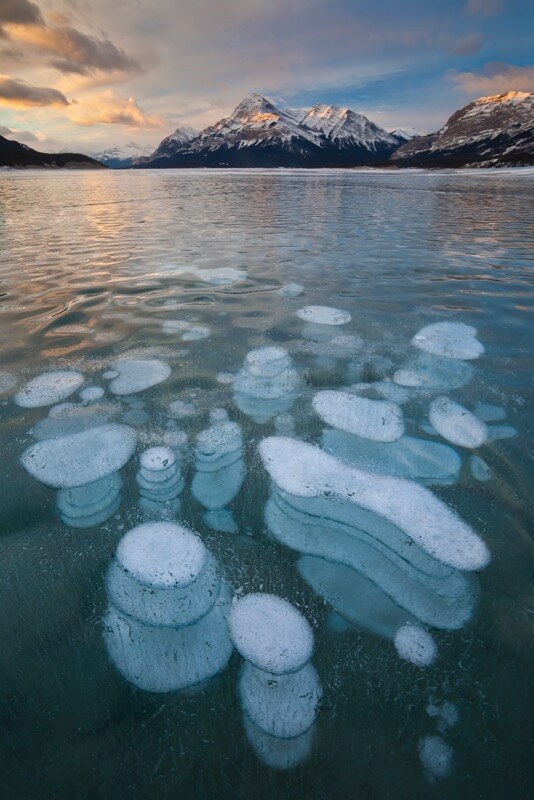
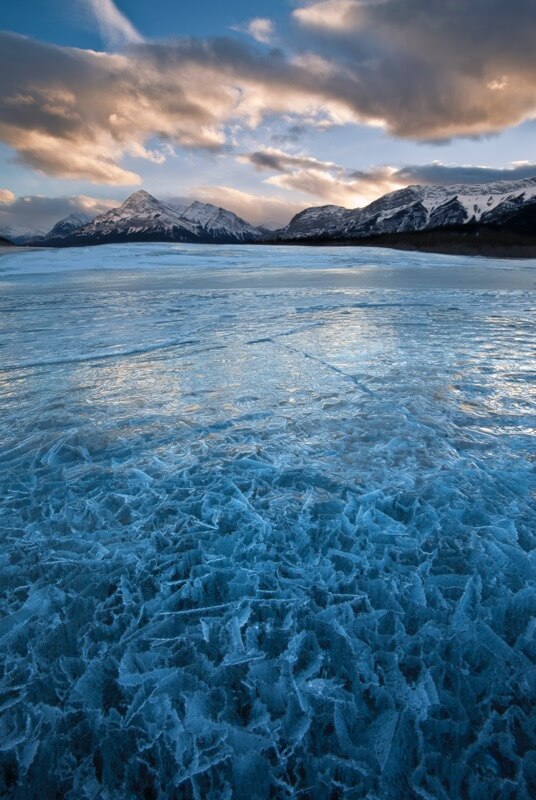
When I was in the Canadian Rockies one winter, I spent some time exploring Abraham Lake. I realized how much potential this lake had, so I stayed for several days, exploring and photographing this lake and all the patterns in the ice. I remember heeding Galen’s advice, and as I look back, am glad I did because now I have all these photos to show for it.
Abraham Lake Cracks, Alberta Canada
Canon 5d Mark II 17-40mm Lens, 5 sec at f/22 ISO 50
Abraham Lake Bubbles, Alberta Canada
Canon 5d Mark II 17-40mm Lens, 1.3 sec at f/18 ISO 50
Abraham Lake Frozen Puzzle, Alberta Canada
Canon 5d Mark II 17-40mm Lens, 1/5th at f/20 ISO 50
Lenses
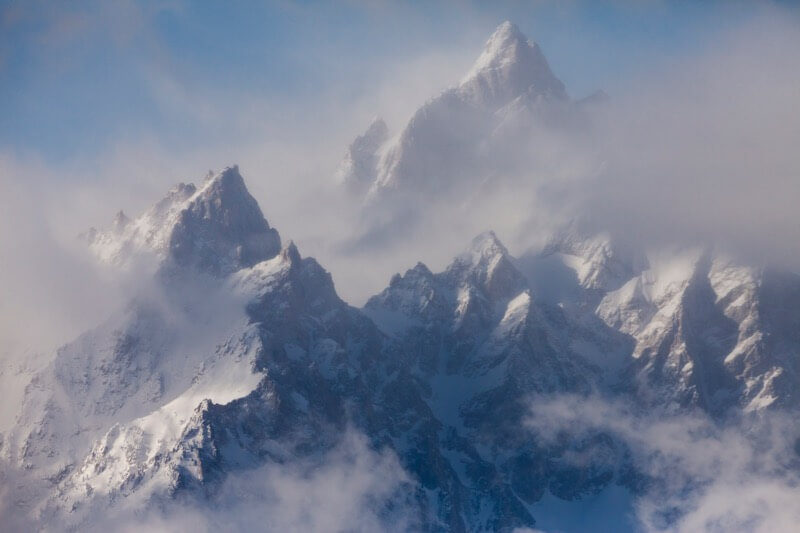
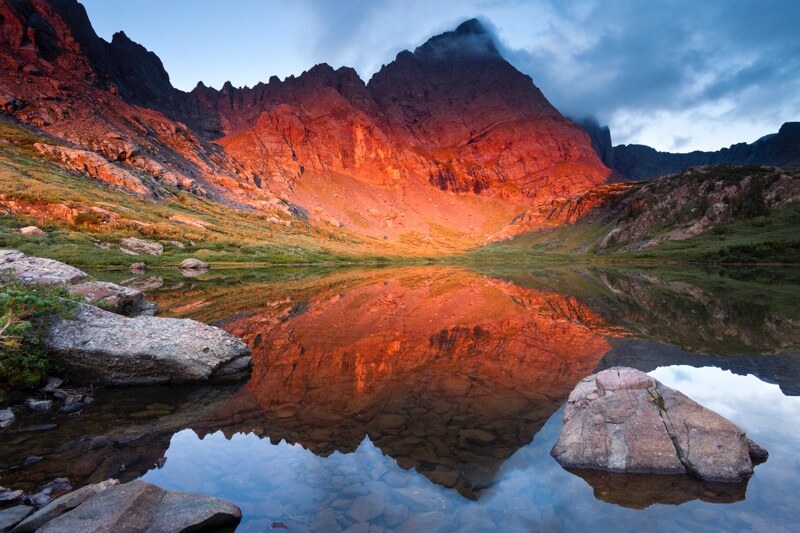
A key to being a good photographer is the ability to use all the lenses in the bag efficiently. It can be easy to get complacent, using only one lens for everything. That is not to say that you must use every lens equally. Obviously, some lenses will be used much more than others. The point is to keep challenging yourself to look at mountains in a different way. This will help you grow and develop as a photographer. These photos show how successful mountain images can be made at both ends of the spectrum: 17mm and 500mm. I typically pull my wide-angle lens out for reflection shots so that I am able to show the whole reflection. Most lakes in the mountains will be pretty close to the peaks they are reflecting, so a wide-angle lens is essential. When I am further away from the summits, I find myself reaching for a medium to long telephoto lens. This can help to compress the peaks and make them seem closer together.
The Cathedral Group, Grand Teton National Park, Wyoming
Canon 5d Mark II 500mm Lens, 1/500th at f/8.0 ISO 200
Crestone Needle, Sangre de Cristos, Colorado
Canon 5d Mark II 17-40mm Lens, 2.5 sec at f/13 ISO 50
Depth of Field
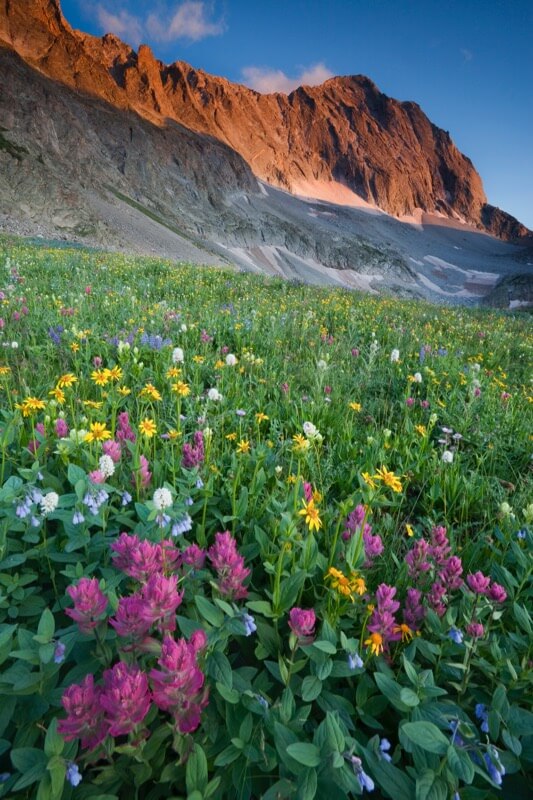
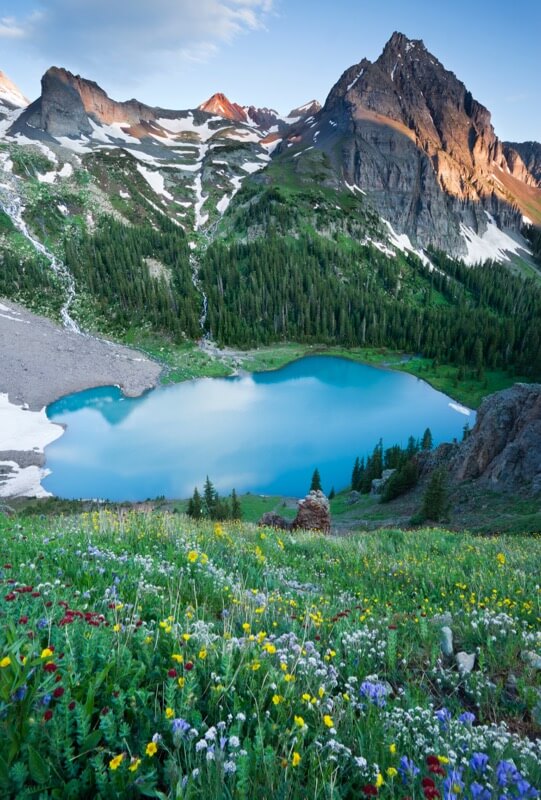
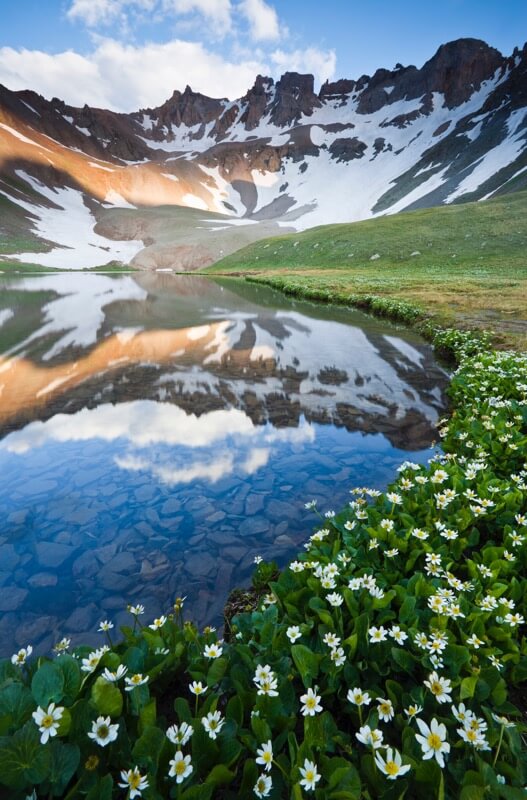
Depth of field is one of the most important elements in landscape photography. It can also be tricky to master. In landscape photography, the photographer generally aims to gain maximum depth of field to keep everything in the frame tack sharp (although rules are made to be broken). The best way to keep everything in focus is by manually focusing to roughly a third of the way into the scene. From there, close the aperture down until the closest and farthest things from your lens are sharp. If you still cannot get things in focus, then there are other techniques such as focus stacking or using a tilt-shift lens. Finding a good foreground that can visually connect to the middle ground and background can be challenging, but look for the classic mountain foregrounds: wildflowers, lakes, rivers, rocks, and other textures. Here are three examples of photos using maximum depth of field with wildflower foregrounds.
Capitol Peak, Snowmass Colorado
Canon 5d Mark II 17-40mm Lens, 1 sec at f/20 ISO 200
Blue Lakes Flowers, Sneffles Wilderness, Colorado
Canon 5d Mark II 17-40mm Lens, 2 sec at f/20 ISO 50
Upper Blue Lake, Sneffles Wilderness, Colorado
Canon 5d Mark II 17-40mm Lens, 1 sec at f/20 ISO 50
Be Flexible
A valuable trait of a landscape photographer is the ability to be flexible. I cannot even tell you how many times I have showed up with a preconceived notion about what I was going to photograph, only to realize that I need to switch to plan B. In nature unexpected things happen, and a good photographer finds a way to shoot “around” whatever challenges get thrown at him or her. The best way to do this is to come with a plan. Have a plan for what you are going to shoot if this or that happens, with a plan B and a plan C. This gives you the ability to jump back and forth between your plans depending on the conditions. A prepared mind is the most valuable tool you can have in mountain photography.
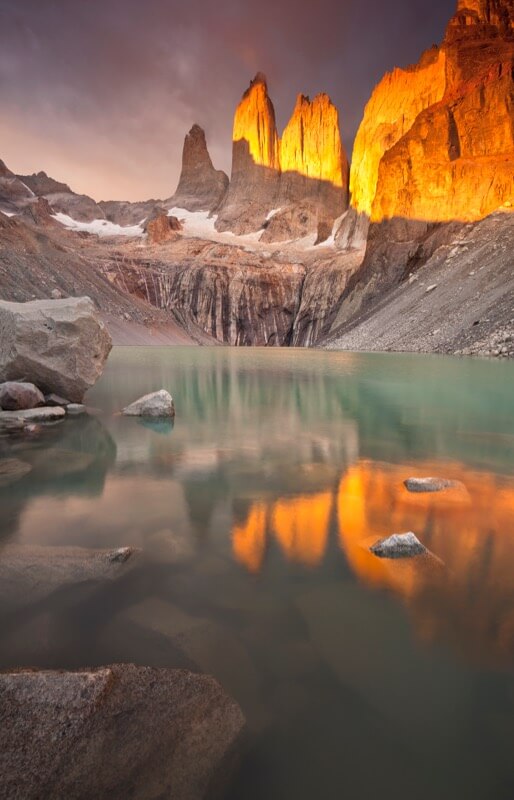
When I woke up at 4 am and crawled out of my tent in Torres del Paine, I saw the tops of the famous towers and knew that it was going to be a great sunrise. My friend Chris and I hiked up the moraine to the lake. I was hoping to shoot a reflection shot of the towers in the lake, but when I got up there, I realized it was too windy for a reflection. So I went to my plan B, which was to have Chris pose in front of these massive towers. I shot him for a while and was pleased with the results, but I kept checking the corner of the lake to see if the ripples were settling down.
Person and Towers, Torres del Paine, Chilean Patagonia
Canon 5d Mark II 17-40mm Lens, .8 sec at f/8.0 ISO 50
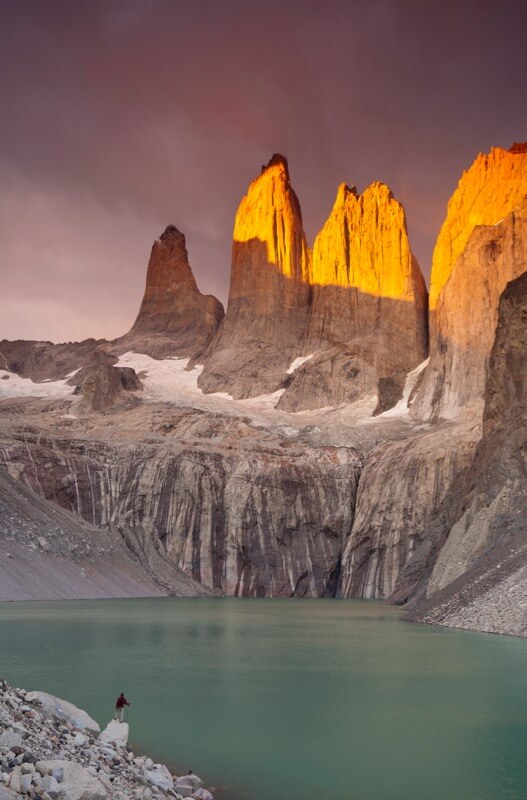
Sure enough, a few minutes later I could see the lake becoming still and knew I would be able to get a reflection. It was time to go back to plan A. I scrambled down to the lake as fast as I could and was able to make this reflection image just before the wind picked up again.
Los Torres, Torres del Paine, Chilean Patagonia
Canon 5d Mark II 17-40mm Lens, 1.6 sec at f/14 ISO 50
Sharpness
One thing a lot of people struggle with is getting really sharp images. There are numerous factors that can contribute to soft images, so likewise, there are a lot of ways to fix the problem. Here are several ways to make sharper images.
First, make sure your tripod is secure. I have seen many people install their tripod in precarious positions, with the head loose and wobbly, wondering why their pictures are blurry. Set your tripod up as sturdy as possible and tighten down all the knobs.
Give up the center column. Most tripods have a center column that extends to give the camera a little more height. With a heavy camera on top of a fully extended center column, the whole setup becomes too top heavy and very unstable. Don’t believe me? Tape a laser pointer to the top of your camera and take a picture of a wall with the center column extended and one with the center column all the way down. You will be surprised how different the red dot on the wall will look.
Use a cable release. No matter how careful you are, you will add vibrations to a long exposure using your finger. If you don’t have a cable release, put your camera on a timer so you have time to remove your finger before the shutter is tripped.
Use mirror lock-up. If you shutter speed is somewhere between 1/60th and 1 second, the slap of the mirror in your camera can add vibrations. The best way to combat this is to use the mirror lock-up function on your camera.
Pay attention to your aperture. This varies from lens to lens, but usually the lens is at its sharpest in the middle of the aperture scale. If possible, try to shoot between f/8.0-f/11. Of course, this is not always possible, but really try to stay away from the widest open aperture and the smallest aperture. Those are usually where diffraction and other lens defects become apparent in your images.
If none of these things are helping, it is possible that your lens needs recalibrating. Before you send your lens away, there are a variety of tests you can do to see if your lens needs fixing. Be sure to consult with your local camera store.
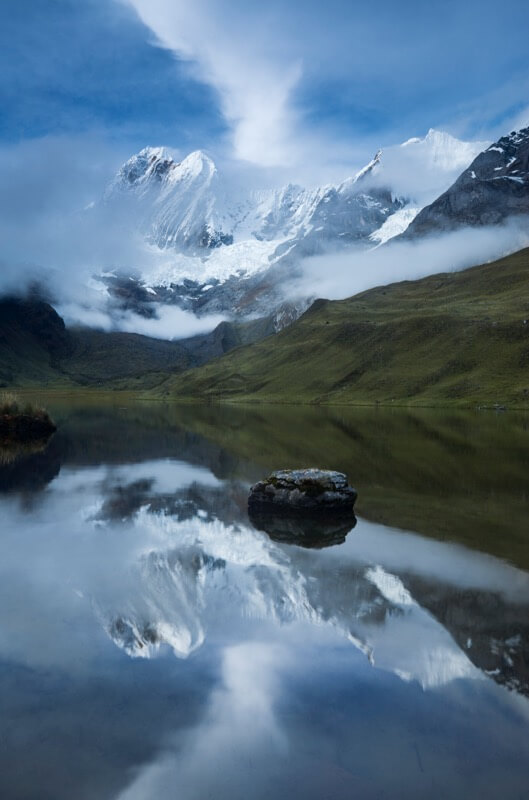
Jirishcanca, Cordillera Huayhuash, Peru
Canon 5d Mark II 17-40mm Lens, .4 sec at f/16 ISO 50
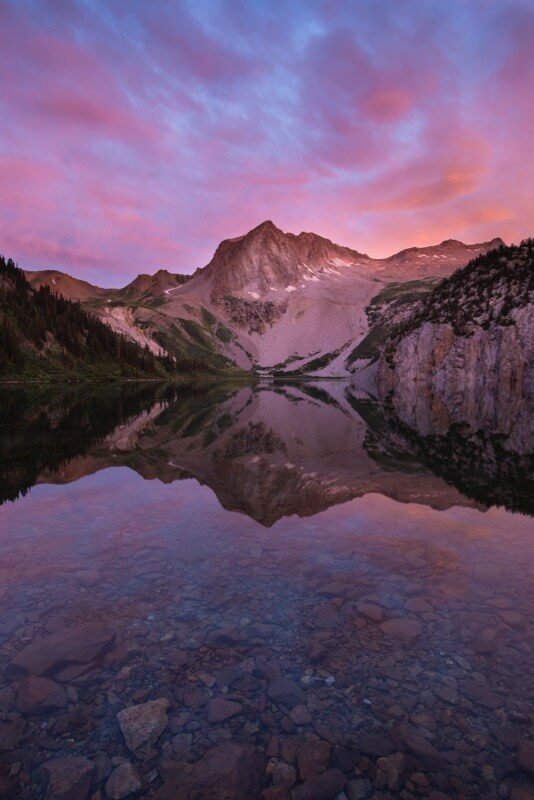
Snowmass Peak, Maroon Bells Wilderness, Colorado
Canon 5d Mark III 17-40mm Lens, 1.6 sec at f/14 ISO 125
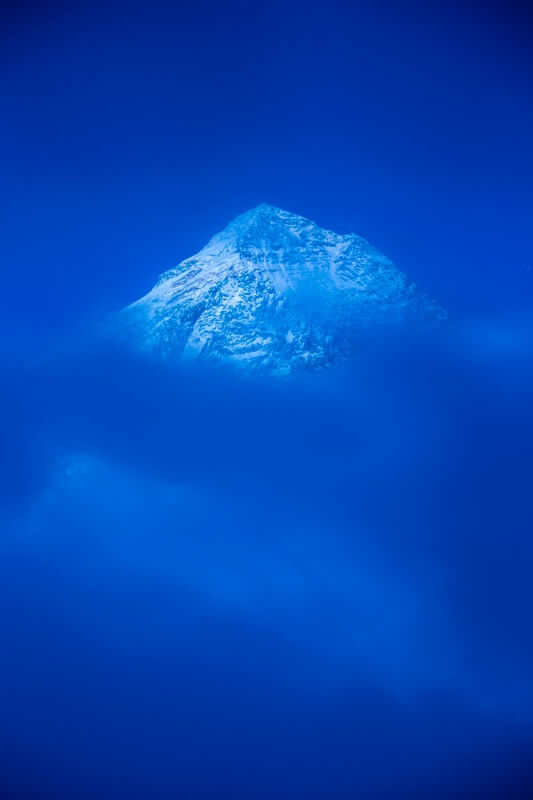
Simplicity
Simplicity is one of the best rules of composition a photographer can follow. Simple images with simple compositions often are the strongest. Images that convey the story in a succinct and direct manner often stand above cluttered and busy compositions. Look at the different elements in your frame and ask yourself “Is this necessary?” It is okay to include a lot of elements in your images, but do not include things that distract the viewer or take away from the subject. Simple images with a strong subject will often leave the strongest impression.
Mt. Everest, Himalaya, Nepal
Canon 5d Mark II 70-200mm Lens, 30 sec at f/7.1 ISO 200
Wildlife
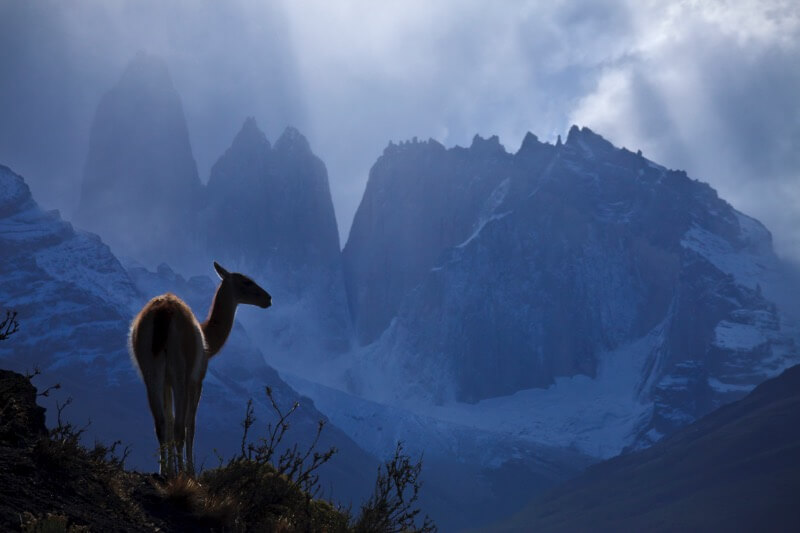
If you spend enough time in the mountains, you are sure to encounter wildlife. Photographing wildlife can be really exciting and challenging. The best wildlife shots are images that show the animal in its environment. I am always trying to photograph animals with a background that shows the landscape in which the animal lives. This can be challenging, but there are several ways to improve your chances of a successful wildlife photo. Try to have your telephoto or medium telephoto lens attached to your camera when you are driving or hiking. This way, you will be ready for unexpected animal encounters. If you do see an animal, try to predict its movements and get in front of it, but respect the animal and do not disturb it. Also, you should always focus on the animal’s eyes. Having the eyes in focus could be the difference between an passable shot and a publishable shot. Above all, be patient. Animals are on their own schedule and it very rarely lines up with your schedule!
Guanaco and Torres, Torres del Paine, Chilean Patagonia
Canon 5d Mark II 70-200mm Lens, 1/800th at f/25 ISO 640
Reflections
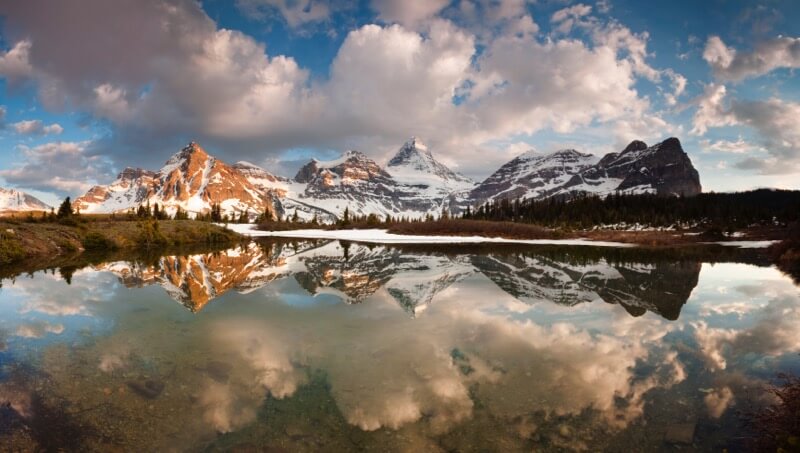
There is nothing better than photographing a high alpine lake reflecting jagged peaks. Getting these sorts of images may seem straightforward, but can be challenging. Always be prepared with the gear you need. A wide-angle lens is helpful for capturing the whole reflection and the surroundings of the scene. A polarizer can help to see rocks and other features below the surface of the water, but be careful that you do not eliminate too much of the reflection. A graduated neutral density filter can be helpful to balance the brightness of the sky against the dark reflection. And as always, a sturdy tripod is an invaluable piece of equipment.
Mount Assiniboine, British Colombia, Canada
Canon 5d Mark II 17-40mm Lens, .3 sec at f/18 ISO 50
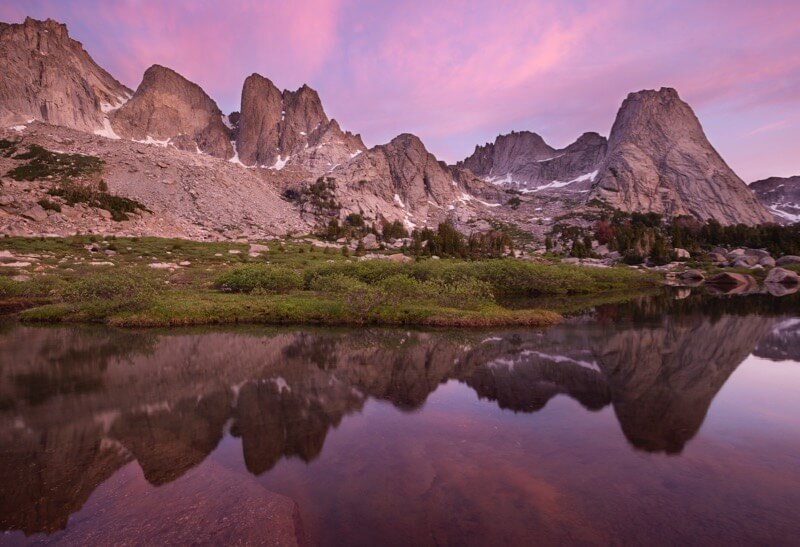
When shooting reflections, one of the most common mistakes is balancing the tones of the reflection to what is being reflected. Always remember that the reflection cannot be brighter than the object that is being reflected. If you use a graduated neutral density filter, it can be easy to darken the sky too much, leaving the reflection brighter. The reflection should be just a hair darker than the reflected objects. Just be aware of this and remember to darken the reflection later in post-processing.
There are, however, a few scenarios where this rule does not apply, such as reflections in highly opaque water like the glacier fed lakes of the Canadian Rockies. Generally speaking, though, all reflections should be darker.
Cirque of the Towers, Wind River Range, Wyoming
Canon 5d Mark III 17-40mm Lens, 1 sec at f/16 ISO 50
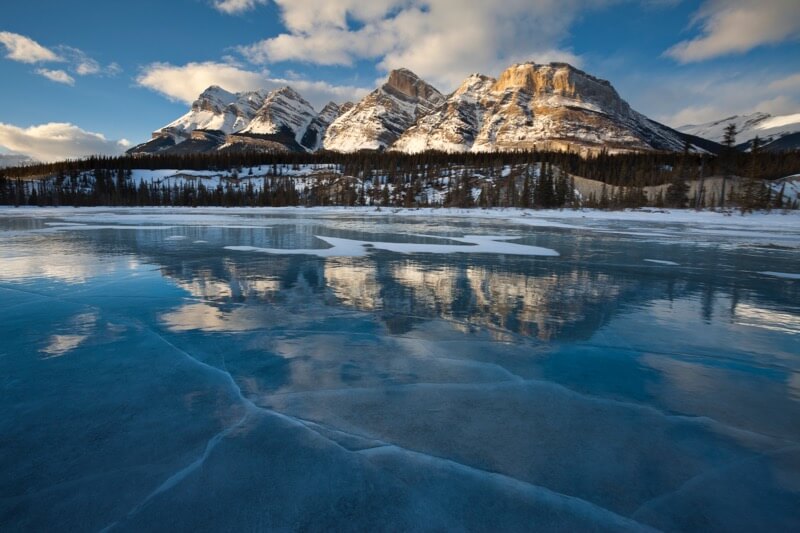
Although harder to find, reflections also occur in winter. Reflections on ice, for instance, can create really compelling images. Not every location will work. The ice needs to be free of snow and relatively smooth. Rivers or lakes that receive lots of wind are good places to start looking.
North Saskatchewan River Sunset, Alberta, Canada
Canon 5d Mark II 17-40mm Lens, 2 sec at f/18 ISO 50
Panoramas
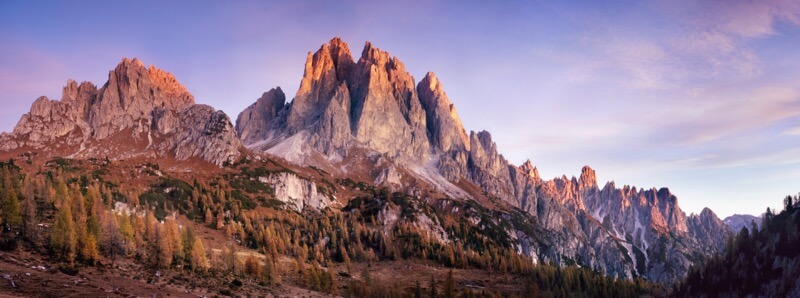
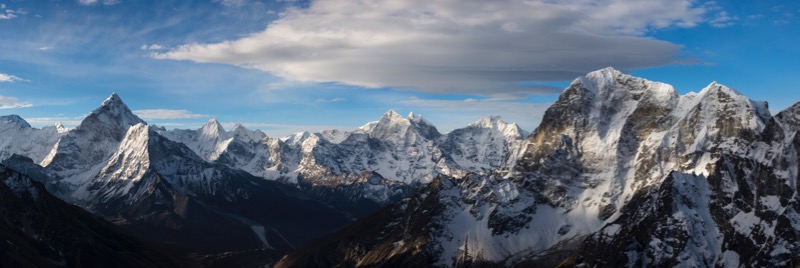
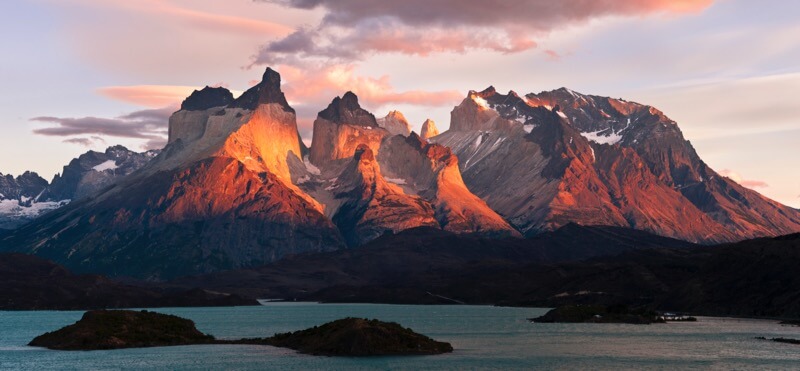
Panoramas are a great technique for mountain photography. Sometimes the only way to capture the grandeur of a mountain range is in the panorama format. The easiest method to make a panorama is to crop a single frame to a panorama aspect ratio. While this method is convenient, it is not ideal. When the image is cropped, a significant amount of information is lost and it will be difficult to make a large print of the low-resolution file.
A better way is to take multiple frames and stitch them together via a photo-editing program like Photoshop. Stitching panoramas together is very easy as long as you follow a few steps while taking the photos in the field. First, everything must be level. The legs of the tripod and the head should be level, that way the camera will rotate evenly and the panorama will stitch correctly. Second, compose the shot wider than you normally would. When the programs stitch the images, there is sometimes a little bit of warping and bending on the edges. If you shoot wider, you can easily crop to the desired composition later. Finally, even though any camera can take a panorama, Really Right Stuff makes a lot of great gear specifically designed to help take better panoramas.
Cadini Group, Dolomites Northern Italy
Mamiya 645 55mm Lens, 1/25th at f/16 Velvia 50, 3 stitched horizontal frames
Khumbu Panorama, Himalaya, Nepal
Canon 5d Mark III 24-105mm Lens, 1/800th at f/10 ISO 400, 4 stitched horizontal frames
Los Cuernos, Torres del Paine, Chilean Patagonia
Canon 5d Mark II 70-200mm Lens, 1/50th at f/14 ISO 50, 5 stitched vertical frames
Check out part 4: Star Images
Follow Grant Ordelheide on Facebook.
