Few things are more awe-inspiring than a dark sky full of millions of stars. Capturing compelling images of stars used to be expensive and time consuming. As digital cameras have become more and more capable, photographing the night sky has become easily accessible. Here are some basic tips to get you out the door and start making memorable star photos.
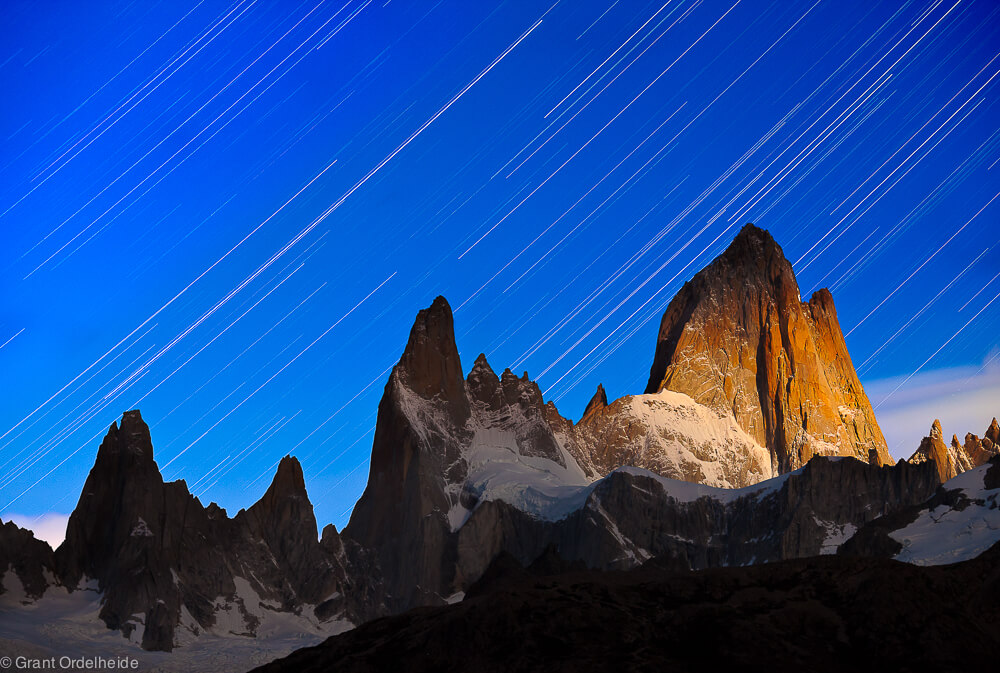
Fitzroy, Glaciers National Park, Argentina. Canon 5d Mark II 70-200mm Lens. 1.5 hours @ f/7.1 ISO 800.
Gear
The most important thing to understand about photo gear is that the latest and greatest gear does not improve your photos. Having the right gear for the right situation is critical, but so is a willingness to get out and start taking images. These days most DSLR cameras have the capability to shoot at night, so get out there with whatever model you have and give it a try. That being said, here is a list of equipment I use when taking star images.
- Full-frame DSLR with high ISO capabilities. I use the Canon 5d Mark III. Having a camera that can shoot at a high ISO with minimal noise is ideal.
- Lenses with a wide aperture. The wider the aperture on your lens (f/2.8-f/4 or wider), the more light you will be able to let into the sensor.
- Tripod. Having a good solid tripod is essential, since all of your exposures will be too long to be hand held.
- Cable Release. These cables enable you to release the shutter without having to touch (and upset) the camera.
- Smartphone with star apps. There are several apps that can help you plan for the right time and place for star photography. A few apps that I use are MoonPhase, Aurora Forecast, and PhotoPills.
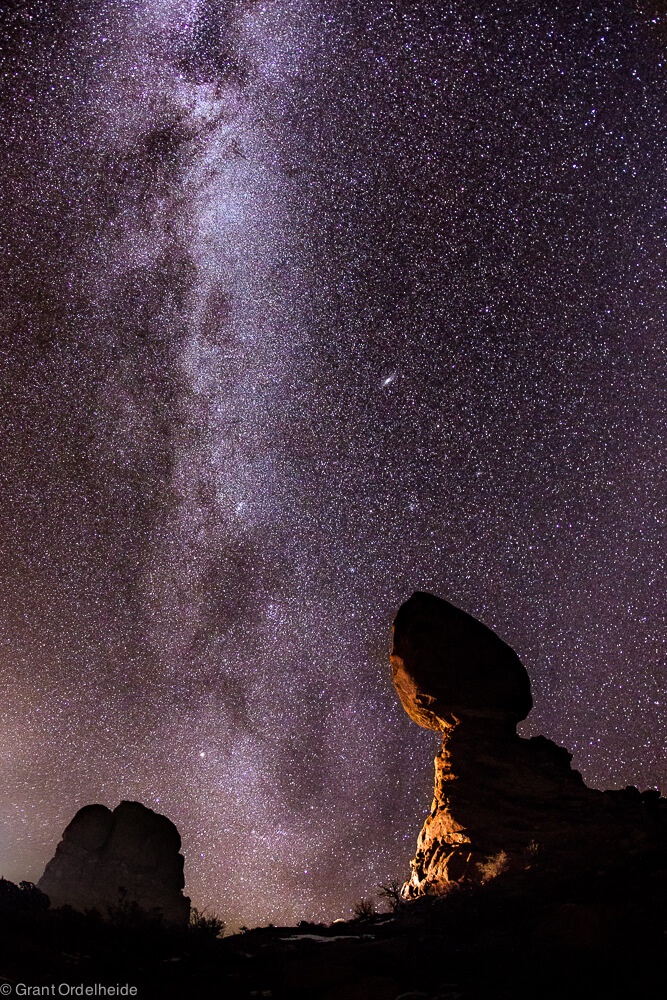
Balanced Rock, Arches National Park, Utah. Canon 5d Mark III 15mm Fisheye Lens. 20 seconds @ f/3.5 ISO 5000.
Planning
Most outdoor photography requires some level of planning, very few people are able to just walk out their front door and nail an amazing shot. Astrophotography is no different. There are three main things I try to consider when I am planning a photo of stars: moonlight, weather, and subject.
The first thing I always consider is what light will be available. If there is a large moon out, my photo will have plenty of light. With the right exposure, a full moon will light the scene as if it were daytime. Sometimes I want there to be moonlight, other times I prefer it to be totally dark, depending on the photo I am trying to take. Generally speaking, however, your stars will look better the smaller the moon is. There are many apps (such as The Photographer’s Ephemeris) that can tell you ahead of time what size and where the moon will be.
Secondly, weather is an important factor in shooting stars. It may seem obvious, but if there are too many clouds, you won’t get nice star images. I spend lots of time looking at the weather forecast (Wunderground), trying to predict how the clouds might turn out. Besides clouds, air pollution and humidity can hinder your ability to capturing a good image of the stars.
Lastly, photos of only the sky are very rarely captivating. Plan to use some feature here on Earth to juxtapose against the sky. Whether it is a mountain, arch, building, or waterfall, make that feature your subject and let the stars act as a secondary element in the photo.
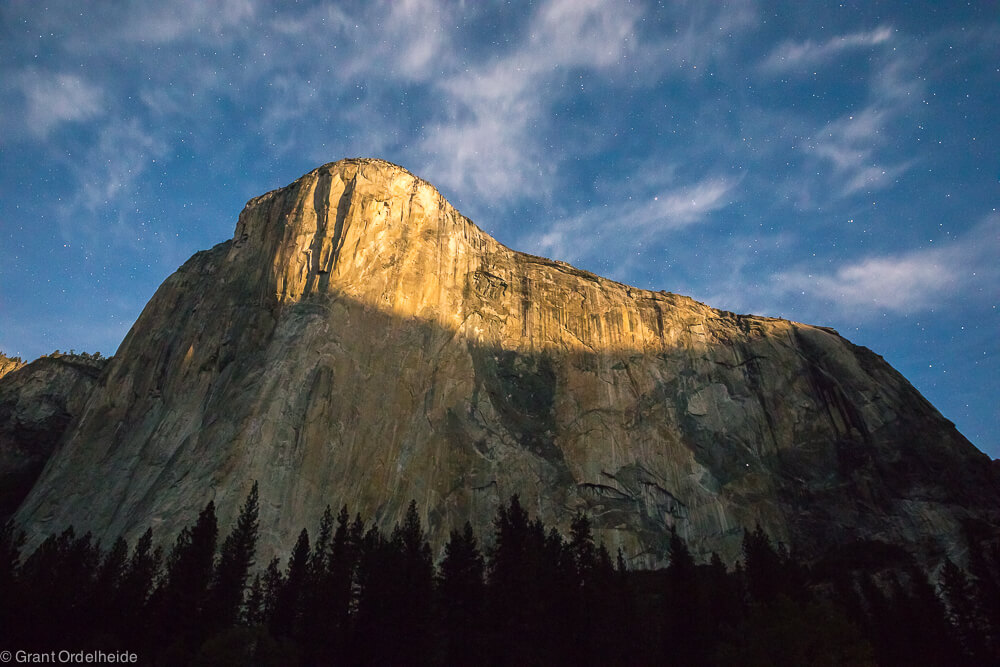
Moonrise on El Capitan, Yosemite National Park, California. Canon 5d Mark III 17-40mm Lens. 15 seconds @ f/4 ISO 2500.
Star Points
There are two ways to photograph stars: points and trails. Star points are single points of light similar to what our eyes see, when you look up at the sky. The trick to a good photo of star points is to get the ideal shutter speed: one that is fast enough to stop the rotating motion of the Earth, yet long enough to let in as much light as possible.
This is where a lens with a big aperture can really be valuable. The exact time for your exposure will vary depending on the aperture you are able to use and the focal length of your lens. Assuming you are photographing with the widest possible aperture (f/2.8-f/4) and with a wide-angle focal length (17mm-35mm), exposures between 15 and 20 seconds will be ideal. An exposure longer than that will turn the small points of light into small streaks. If your focal length is more on the telephoto end (70mm and up), those exposure times will need to be shorter to keep the stars from streaking.
Your ISO will need to be pretty high (1600 and up), but most cameras these days are capable of going to the upper limits of their ISO. First, I usually determine what my shutter speed needs to be to keep the stars from streaking, as well as what my widest aperture is. Then, using the shutter speed and aperture, I can determine what ISO I should use.
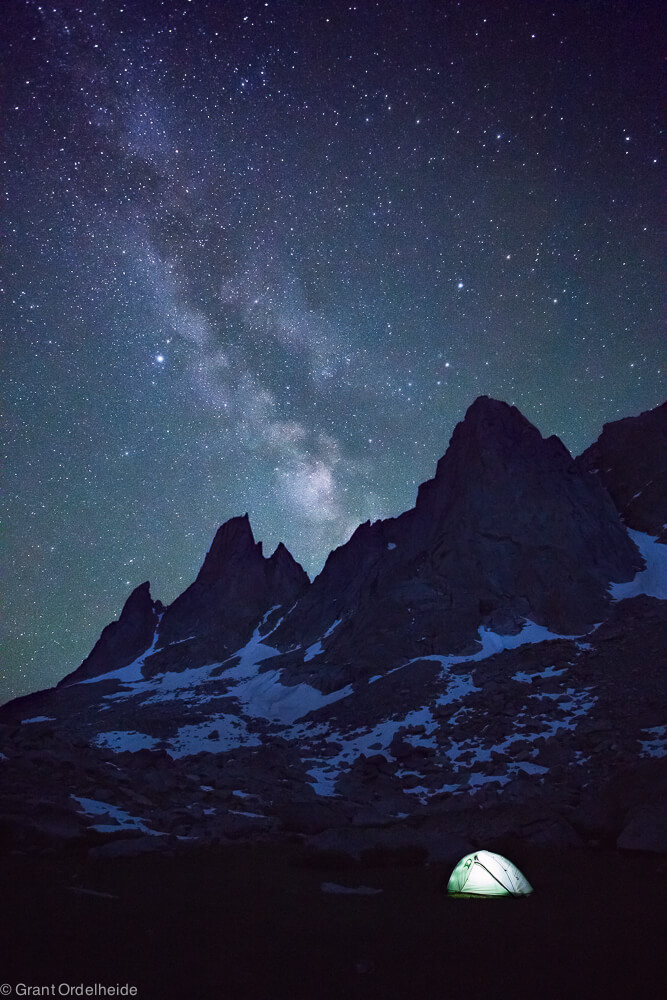
Cirque of the Towers, Wyoming. Canon 5d Mark III 17-40mm Lens. 20 sec @ f/4.0 ISO 4000.
Trails
Star trails, on the other hand, are created through long exposures where the rotation of the Earth gives the impression of moving stars. The movement of star trails can add a dynamic energy to the photo. While they can be more difficult to shoot, star trail photos can also be really rewarding.
Similar to star points, the length of the exposure depends a lot on what focal length you are shooting at. A very tight telephoto shot—let’s say 200mm—would probably take ten to fifteen minutes to get a decent trail. A wide-angle image would need much longer to get long enough trails, sometimes hours if you want the trail to go from corner to corner.
There are two ways to go about making a long exposure for star trails. The simplest way is by taking a single long exposure. The length of time varies depending on your focal length, light availability, and desired star trail span.
While it certainly is possible to capture everything in one frame, leaving the shutter open for too long will allow the sensor to heat up. This will introduce more noise in the image, or worse, permanently damage the sensor. Ten to fifteen minutes is probably where I would draw the line for a single exposure. Make sure you have a cable release so that you can hold the shutter down for long periods without having to touch the camera.
The alternative, if you plan on shooting for longer than ten to fifteen minutes, is to take shorter exposures and then layer them together in Photoshop. By using an intervalometer (some cameras have one internally, otherwise use an intervalometer cable release), you can time exposures to go off one after another at a set interval. These exposures can be anywhere from one to seven minutes. I typically try to make the exposures a little longer so I have less overall files to deal with later.
Because the goal is to have a longer exposure (compared to 15-20 seconds for star points), you can shoot each image at a lower ISO. When you are done, you will have many files with shorter star trails. When merged together in Photoshop, these photos will create a continuous trail for the total time of the exposures. Even though this technique is a little more involved, it will result in a cleaner image that will ultimately print nicely.
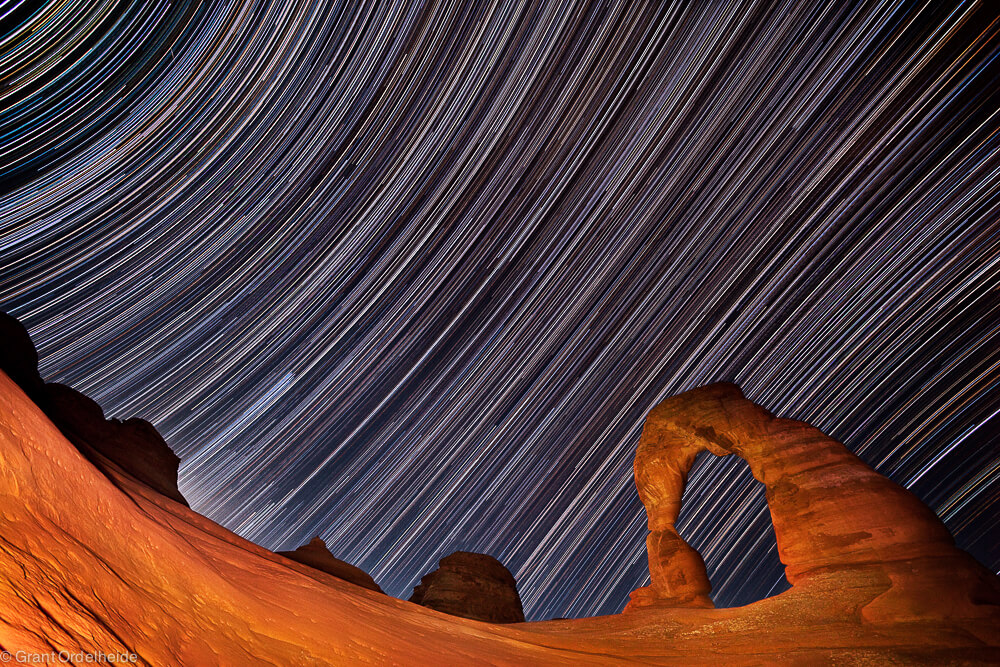
Delicate Arch, Arches National Park, Utah. Canon 5d Mark II 17-40mm Lens. 8 hours @ f/7.1 ISO 640.
Other Considerations
Here are a few other things to consider when photographing at night:
Autofocus only works when there is a light source. Nothing is more frustrating than getting out in the dark and not being able to focus your lens. You will want your lens focused at infinity, so if your lens has an accurate mark for infinity, you are set.
Otherwise, you can try the following options. The first way to focus is to take a photo, check and adjust that focus, and then repeat until the image is sharp. I know people that do this and have success with it, but for me it always seems a little too time-consuming.
What I prefer to do is to find some sort of light source that is roughly at infinity focus that I can use autofocus on. (For most lenses, infinity focus is about 30m and beyond.) The moon, distant city lights, passing cars, a person with a headlamp, and other light sources (assuming they are at least 30m away) can be used to focus your lens with autofocus. Once I see that the focus has locked in, I switch off my autofocus and am careful not to touch the focusing ring while I am shooting.
Light pollution can be a blessing and a curse. I have seen photos where the funky colors from city lights add a bit of interest to the image, but this is not typically the case. Most light pollution will give your images an unfortunate color and diminish the amount of stars you can see. Plan to head out somewhere far away from a big city for the best results.
When taking a long exposure, be aware of potential condensation on your lens. If it is cold out and even a little humid, the lens will fog up and freeze, rendering your photos useless.
If shooting a single photo, for either star points or shorter trails, be sure to have the Long Exposure Noise Reduction function on; most modern DSLRs have this function. This function helps to eliminate noise and hot pixels that are caused by long exposures and a high ISO. If you are doing star trail image with multiple exposures, turn off the Long Exposure Noise Reduction, as it will cause a backup in the exposures, which means they wont blend together correctly.
Turn off your VR/IS on your lens. These stabilization functions will try to move while on the tripod, ultimately blurring your image.
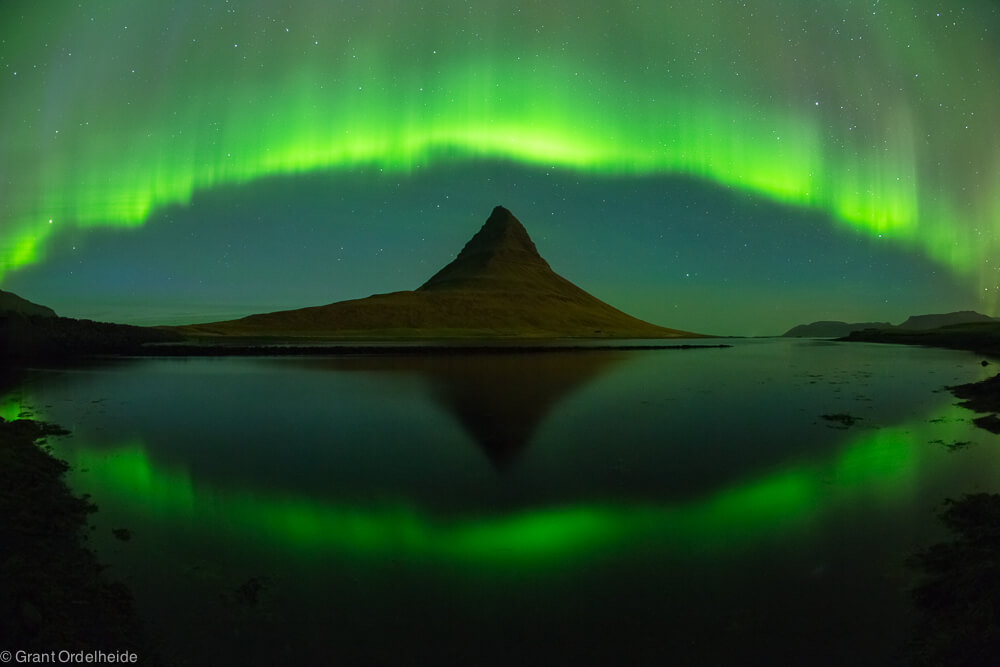
Aurora over Kirkjufell, Iceland. Canon 5d Mark III 15mm Fisheye Lens. 20 seconds @ f/3.5 ISO 2000.
See more of Grant Ordelheide’s photography on his website and Instagram.
