Photographing landscapes at night is a great way to expand your skillset and create unique images. Shooting at night has its own set of challenges, but it can be a very rewarding way to capture the landscape. This post is intended to offer a few tips to get you started in nighttime landscape photography.
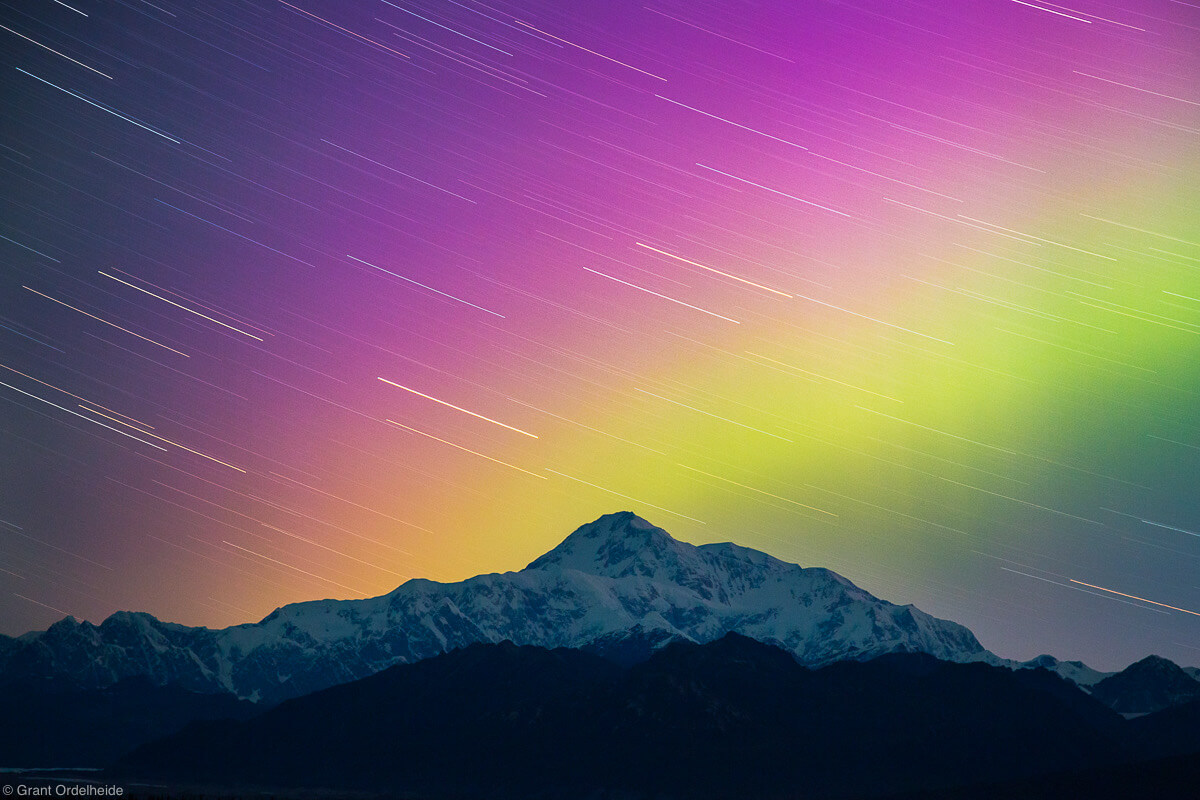
Caption: Denali and Aurora Borealis.
Canon 5d Mark III 24-105mm lens, 8 min @ f/4.0 ISO 1250
In the days of film, shooting at night was extremely challenging. Your options were limited to long exposures of star trails or using expensive astronomy equipment to allow your camera to move and track stars. Today, the latest digital SLR cameras make it easier than ever to shoot night scenes. When heading out to shoot, remember these considerations.
Light
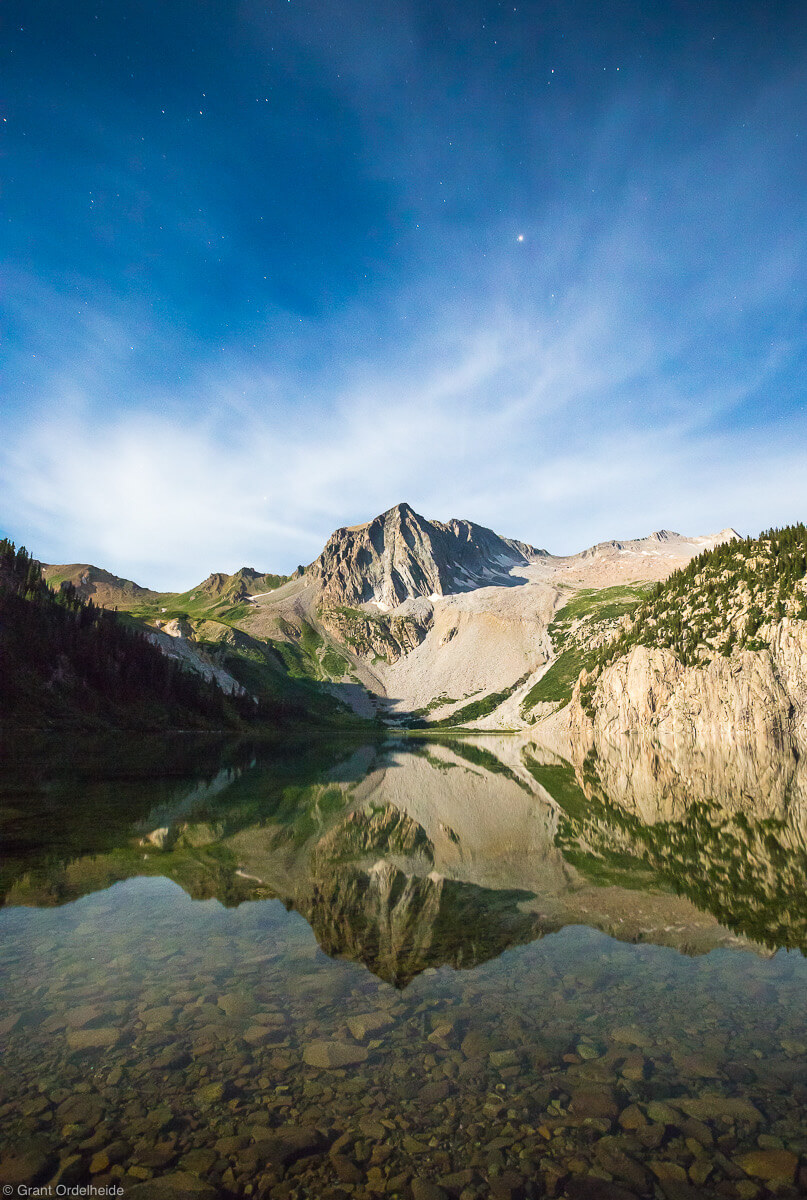
Moonlight over Snowmass Lake.
Canon 5d Mark II 17-40mm lens, 15 sec @ f/4.0 ISO 1600
Light is always one of the most important elements of any photograph, and shooting at night is no exception. The easiest way to light up a nighttime landscape is to use a natural light source such as the moon. Any landscape photographer knows that the best times to shoot are early in the morning and late in the evening when the sun is closest to the horizon and the light is the richest.
At night, there is no sun, but the principles remain the same. Shooting a full moon when it is high in the sky will light the scene similar to shooting in the middle of the afternoon during the day. By using planning apps (The Photographers Ephemeris, PhotoPills, etc.) you can plan to shoot scenes as the moon is rising or setting, bathing the landscape in the nice warm moonlight. The best time to use the moon is when it is partially full. Then, it will be bright enough to light up the landscape, but still dim enough to see a lot of stars.
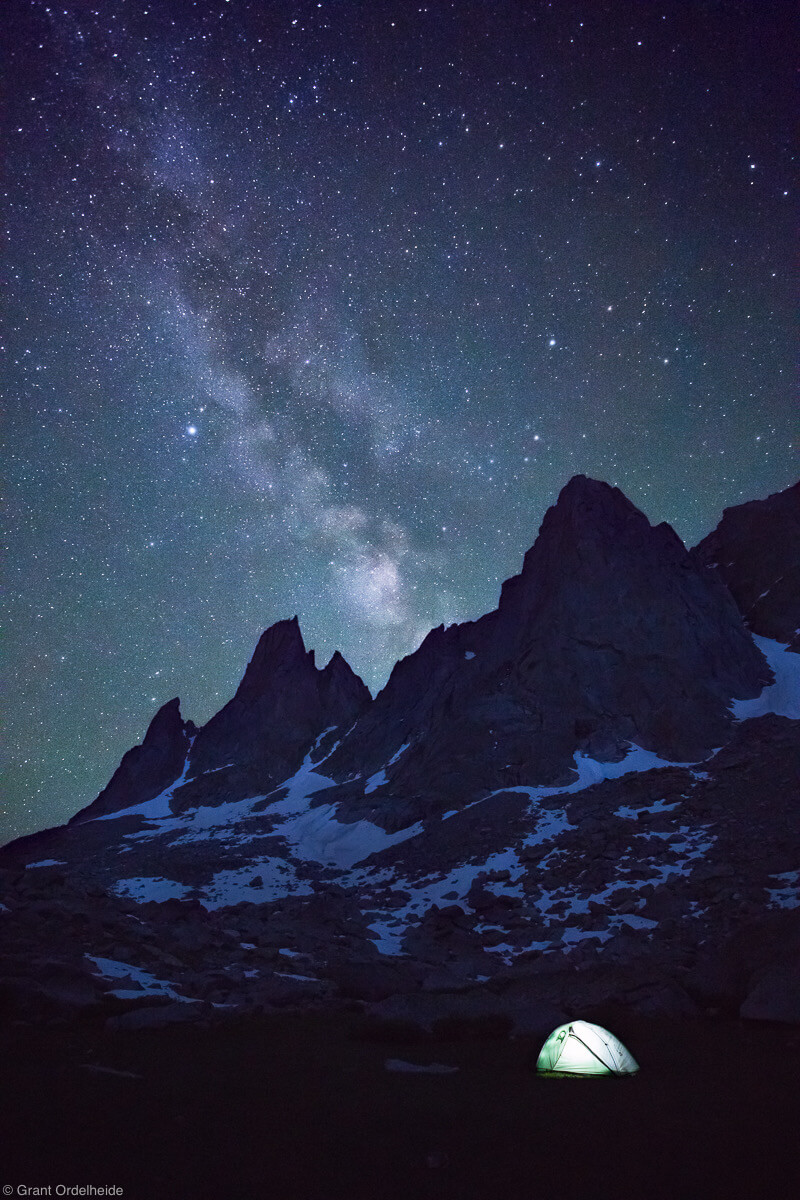
Milky Way over Cirque of the Towers.
Canon 5d Mark III 17-40mm lens, 20 sec @ f/4.0 ISO 2000
The next option for lighting a scene is artificial light. Using a strobe or headlamp can add the light selectively to certain subjects. When using artificial light, try not to illuminate the subject from directly behind the camera. This will create a flat, uninteresting light that will not flatter the subject. Instead, try lighting up the landscape from an angle. This creates shadows and will give the landscape more depth.
The last option for lighting up a nighttime landscape is to blend multiple exposures of different lengths. Typically you will want to have a 15-25 second exposure for the stars in the sky. Unless the moon (or headlamp) is out, this will not be enough to show detail in the landscape. You can get the best of both worlds by making one exposure for the sky, and then another longer exposure for the ground. As long as nothing in the scene is moving and you are careful not to move the tripod, they should blend together for a natural looking scene.
Star Trails vs. Star Points
Caption: Milky Way over Half Dome.
Canon 5d Mark IV 15-30mm lens, 15 sec @ f/2.8 ISO 4000
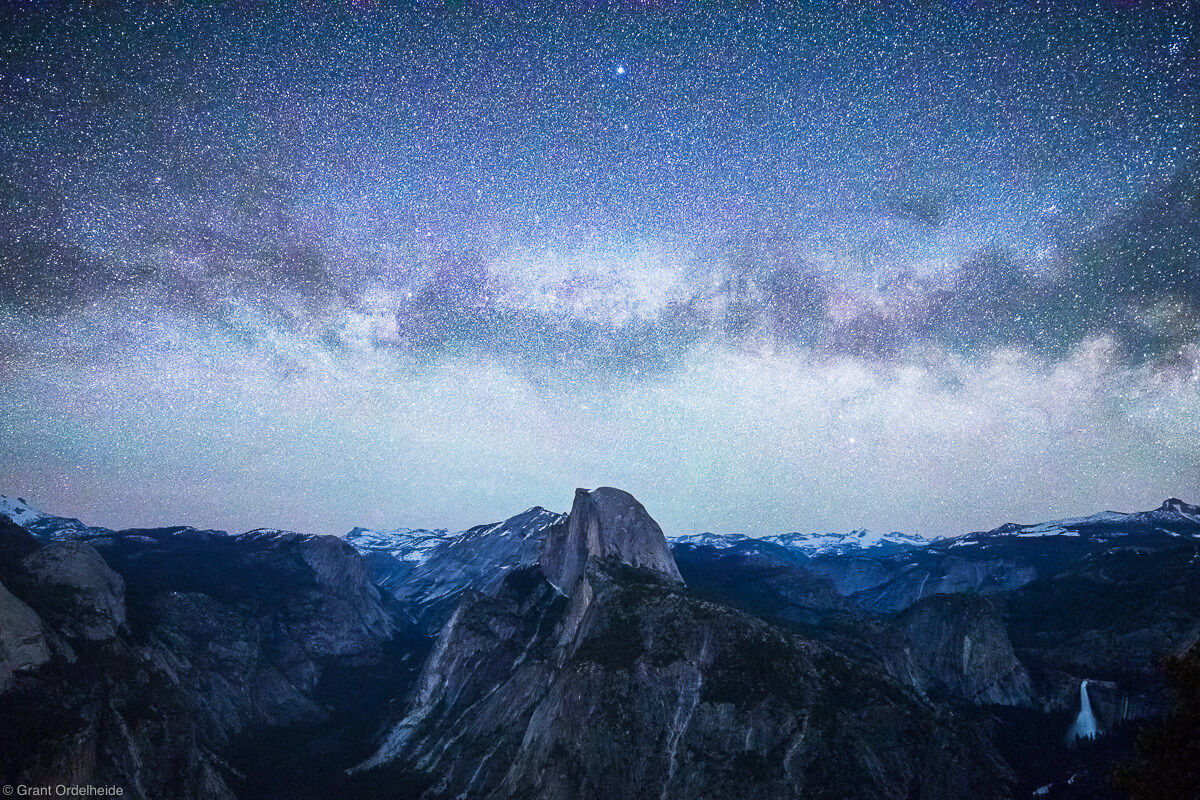
There are two ways to photograph stars: points and trails. Star points are points of light like we see with our naked eyes, whereas star trails are long exposures showing a streak of light as the Earth rotates. Both star trails and points can add a lot of visual interest to a photograph.
For star points, you want to shoot the longest (brightest) exposure you can before the Earth’s rotation turns the points into tiny streaks. Try bumping up your ISO (how high depends on your camera’s capability) and opening up your aperture to let in as much light as possible. The exact timing of the exposure can vary depending on the focal length of your lens and the ISO you are using. Typically, stars will start to blur at around 20-25 seconds but can start to streak at even shorter times if you are using a telephoto lens.
Star Trails over Death Valley.
Canon 5d Mark II 17-40mm lens, 6 hours @ f/7.1 ISO 500
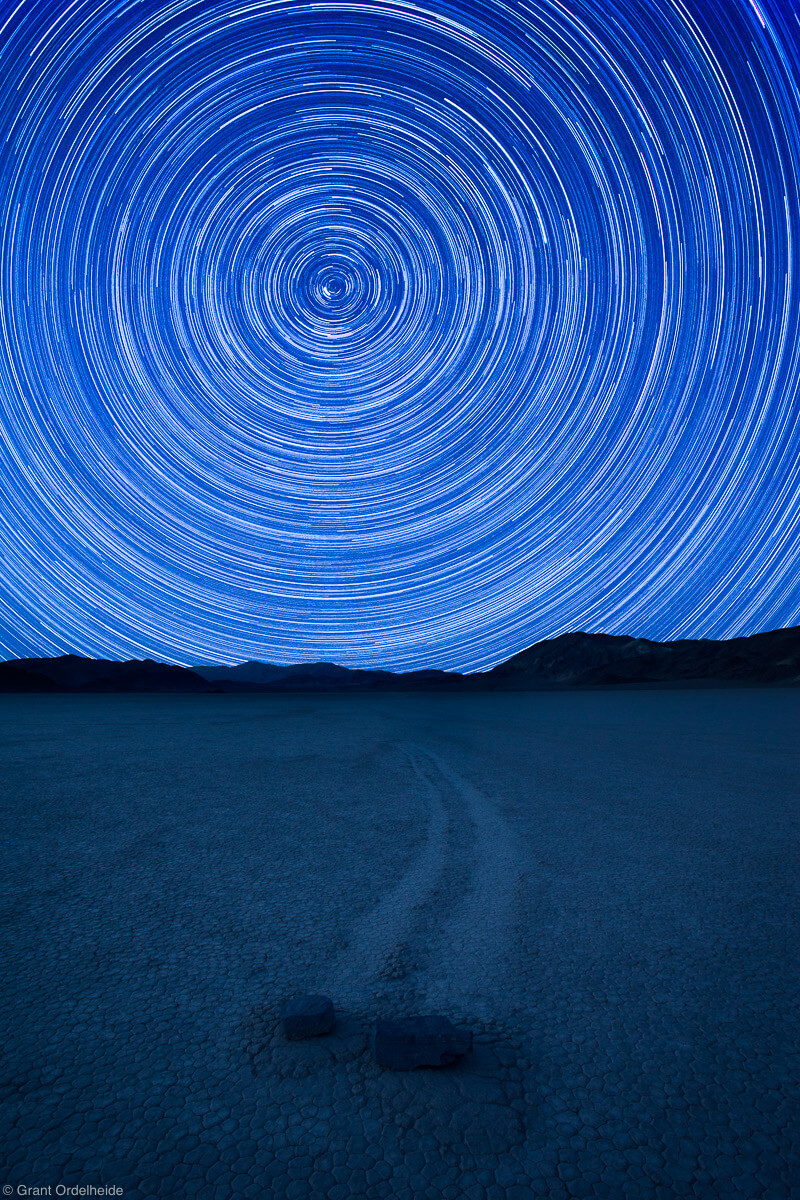
For star trails, you want to have a long exposure to show longer streaks. Exposure times can be anywhere from a few minutes to several hours depending on your focal length, available light, and desired length of star trail. The simplest way to shoot star trails is to put your camera on Bulb mode and just open the shutter for several minutes. If your exposure is about ten minutes or less, you can do it in one shot. Because the goal is to make the exposure longer, you can use a lower ISO and get a cleaner overall image.
If your exposure is longer than ten minutes, it is best to break it up into multiple shorter shots and combine them later in Photoshop. Opening the shutter for long periods of time can introduce unwanted noise and cause the sensor to heat up, which could potentially cause permanent damage. To create a single star trail image using multiple exposures, use an intervalometer cable release (some cameras have this feature built-in) to take back-to-back-to-back exposures. Each exposure should be between one and seven minutes long. I typically shoot them a little longer so I have fewer files to deal with later.
For example, if I want to create a one-hour star trail, I will set the intervalometer to take twelve five-minute exposures with 2-4 seconds between each exposure. You want the shutter to close between exposures for a few seconds, but not enough that there are gaps in the trails. Be careful not to move the camera as even the slightest shift will cause the photos to be misaligned. When you have finished all the shots, they can be loaded into a stack in Photoshop and blended together to create one continuous star trail for the total time of the exposures.
Composition
Aurora Borealis in the Yukon Territory.
Canon 5d Mark III 15-30mm lens, 20 sec @ f/ 3.2 ISO 1250
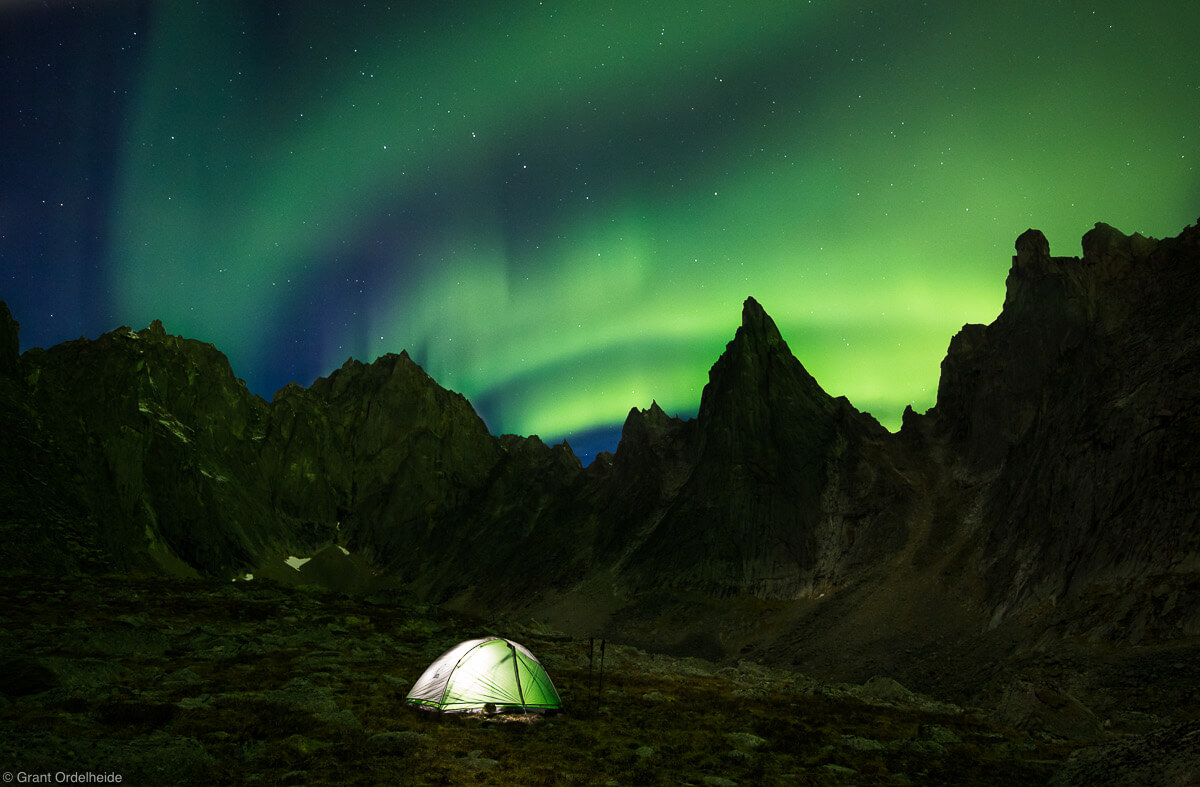
Shooting the night sky is exciting, but rarely is a photo of just stars very captivating. Find an interesting subject on Earth to create a juxtaposition with the starry sky. I often try to compose objects (mountains, towers, trees, etc.) that extend above the horizon to show an interaction between Earth and sky. Remember as you are forming your composition that most of the time, you will be shooting with a wide open aperture, so your depth of field will be shallow.
Other Challenges To Consider
Properly focusing is always one of the trickiest things to do when photographing nighttime landscapes. Most of the time, you will want your lens to be focused at infinity. On most lenses, infinity focus is at 30m and beyond. There are several ways to get your lens focused in the dark, including trial and error, or making a reliable mark at infinity on your lens during the day.
My preferred method is to find a light source that I can comfortably assume is farther away than 30m. Then, I use autofocus to bring my lens into focus. The moon, passing cars, distant city lights, or a friend with a headlamp are all bright enough to get the autofocus to work properly. As long as those light sources are farther than 30m, I know my lens will be focused at infinity.
Once focused, turn off autofocus while being careful not to touch the focusing ring and recompose the shot, knowing it will be tack sharp.
Also, turn off your IS/VR features on your lens. These stabilization functions can cause movement while on your tripod, blurring your images.
Consider light pollution. If you are trying to shoot nighttime landscapes near a big city, you will find that the light pollution will give you unusual color casts and diminish the number of stars you will see. It is best to shoot in remote areas away from the city lights.
Most cameras have a Long Exposure Noise Reduction function. This is a great thing to have if you are shooting star points. It effectively takes another exposure in camera for the same time period and eliminates excess noise from the original exposure. However, if you are shooting multiple images to create a long star trail image, it is important to turn this feature off. The noise-eliminating feature will mess up the sequence of your images, and the stars won’t align properly.
Most of all, remember to get out and have fun experimenting with nighttime photography. It is a learning process that takes some time to get used to. Sleep deprivation is a small price to pay for the feeling of really nailing a nighttime landscape!
Also check out our Simple Guide to Photographing Big Mountains, a 5-part series dedicated to helping photographers take better alpine pictures, where I also discuss shooting star images.
